


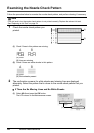

46 Routine Maintenance
Print Head Deep Cleaning
If print quality does not improve by standard Print Head Cleaning, try Print Head Deep Cleaning,
which is a more powerful process. Note that cleaning the Print Head causes used ink to be absorbed
in the ink absorber. Print Head Deep Cleaning consumes more ink than standard Print Head
Cleaning, so perform this procedure only when necessary.
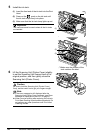
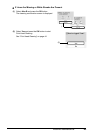
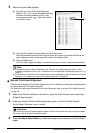
1 Make sure that the machine is turned on, open the Front Feeder, and extend the
Output Paper Support.
2 Load a sheet of A4 or Letter-sized plain paper in the Auto Sheet Feeder or the
Front Feeder.
Set the Paper Thickness Lever to the left.
3 Press the Paper Feed Switch to select the paper source where you have loaded
paper.
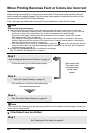
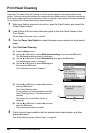
4 Start Print Head Deep Cleaning.
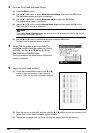
(1) Press the Menu button.
(2) Use the [ or ] button to select Maintenance/settings, then press the OK button.
The Maintenance/settings screen is displayed.
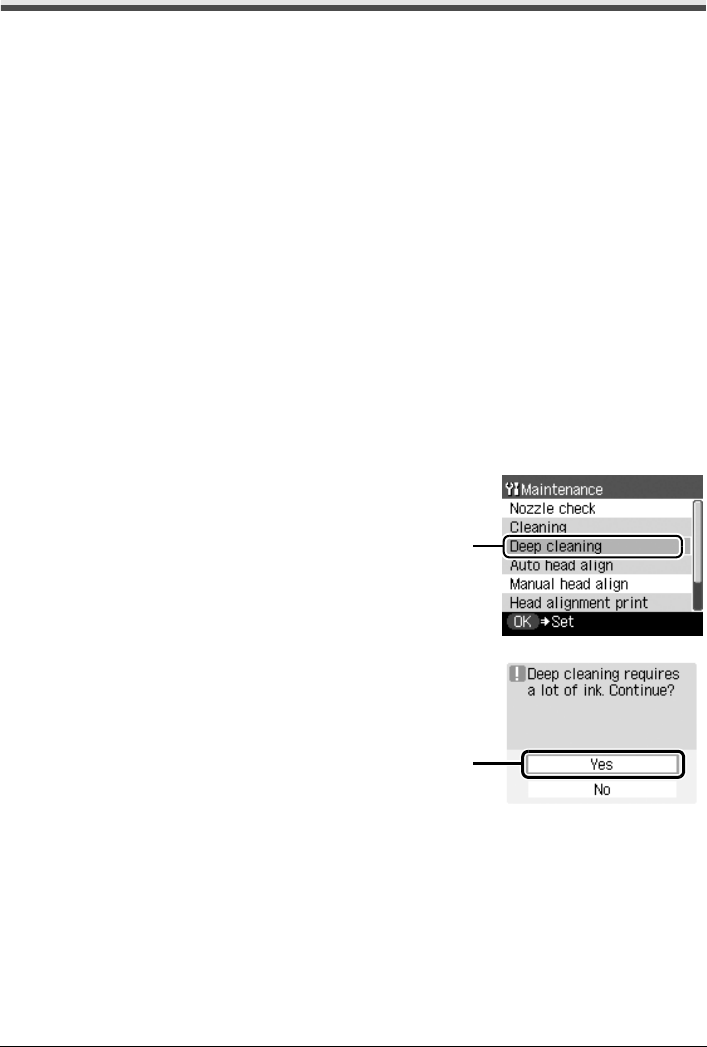
(3) Use the [ or ] button to select Maintenance, then press the OK button.
The Maintenance screen is displayed.
(4) Use the { or }
button to select Deep
cleaning and then press the OK button.
The confirmation screen is displayed.
(5) Use the { or }
button to select Yes and then
press the OK button.
Print Head Deep Cleaning starts.
Do not perform any other operations until Print
Head Deep Cleaning finishes. This takes about
100 seconds.
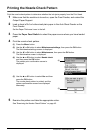
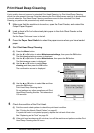
5 Check the condition of the Print Head.
(1) Print the nozzle check pattern to check the print head condition.
See “Printing the Nozzle Check Pattern” on page 41.
If a particular color is not printed properly, replace the ink tank of that color.
See “Replacing an Ink Tank” on page 34.
(2) If the print head nozzles are still not clean, turn off the machine and perform another Print
Head Deep Cleaning after 24 hours.
(4)
(5)