


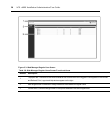

3. Select Remote Server - IPv4 to enable syslog messages to be sent to one or more remote
IPv4 syslog servers, and enter the IPv4 Address or Hostname. Separate multiple server
addresses by commas.
-or-
Select Remote Server - IPv6 to enable syslog messages to be sent to one or more
remote IPv6 syslog servers, and enter the IPv6 Address or Hostname. Separate multiple
server address by commas.
4. Select Appliance Console to send messages to the virtual console server.
5. Select Root Session to send syslog messages to all sessions where you are logged in as root
user.
6. Under the SNMP Trap heading, enter the name of the community defined in one or more of
the SNMP trap servers in the Community field then enter the IP addresses of up to five
servers in the server fields.
7. Under the SMS heading, enter the SMS Server, Port and Pager Number information in the
appropriate fields.
8. Under the Email heading, enter the Server, Port and Destination Email information in the
appropriate fields.
9. Under the DSView heading, enter the IP address of the DSView 3 server where event
notifications will be sent in the DSView 3 server field. Enter the syslog server port number
for the DSView 3 server, the SSH information and the buffer warning information in the
appropiate fields.
10. Click Save.
Data Buffering
To configure Data Buffering:
1. Select Events and Logs - Data Buffering.
2. Enter the segment size in kilobytes and spare segments in the Local Data Buffering
Settings section.
3. In the NFS Data Buffering Settings section, enter the following information: NFS Server,
NFS Path, Segment Size (Kbytes) and Spare Segments.
NOTE: RPC servicemustbe enabledinthe SecurityProfilescreen before configuringNFS DataBuffering
Settings.NFSdoesnot support IPv6.
Chapter 3: Accessing a Virtual Console Server via the Web Manager 47