


2-9
Catalyst 2940 Switch Software Configuration Guide
78-15507-02
Chapter 2 Using the Command-Line Interface
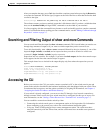
Searching and Filtering Output of show and more Commands
After you complete the entry, press Ctrl-A to check the complete syntax before pressing the Return key
to execute the command. The dollar sign ($) appears at the end of the line to show that the line has been
scrolled to the right:
Switch(config)# access-list 101 permit tcp 131.108.2.5 255.255.255.0 131.108.1$
The software assumes you have a terminal screen that is 80 columns wide. If you have a width other than
that, use the terminal width privileged EXEC command to set the width of your terminal.
Use line wrapping with the command history feature to recall and modify previous complex command
entries. For information about recalling previous command entries, see the “Editing Commands through
Keystrokes” section on page 2-7.
Searching and Filtering Output of show and more Commands
You can search and filter the output for show and more commands. This is useful when you need to sort
through large amounts of output or if you want to exclude output that you do not need to see.
To use this functionality, enter a show or more command followed by the pipe character (|), one of the
keywords begin, include, or exclude, and an expression that you want to search for or filter out:
command | {begin | include | exclude} regular-expression
Expressions are case sensitive. For example, if you enter | exclude output, the lines that contain output
do not appear, but the lines that contain Output do appear.
This example shows how to include in the output display only lines where the expression protocol
appears:
Switch# show interfaces | include protocol
Vlan1 is up, line protocol is up
Vlan10 is up, line protocol is down
GigabitEthernet0/1 is up, line protocol is down
GigabitEthernet0/2 is up, line protocol is up
Accessing the CLI
Before you can access the CLI, you need to connect a terminal or PC to the switch console port and
power on the switch as described in the hardware installation guide that shipped with your switch. Then,
to understand the boot process and the options available for assigning IP information, see Chapter 4,
“Assigning the Switch IP Address and Default Gateway.”
If your switch is already configured, you can access the CLI through a local console connection or
through a remote Telnet session, but your switch must first be configured for this type of access. For
more information, see the “Setting a Telnet Password for a Terminal Line” section on page 7-5.
You can establish a connection with the switch by either
• Connecting the switch console port to a management station or dial-up modem. For information
about connecting to the console port, refer to the switch hardware installation guide.
• Using any Telnet TCP/IP package from a remote management station. The switch must have
network connectivity with the Telnet client, and the switch must have an enable secret password
configured.