


116 I/O Panel
www.dell.com | support.dell.com
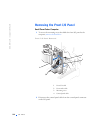
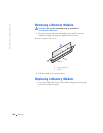
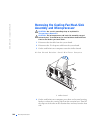
Note the routing of the control panel cable as you remove it from the
computer so that you can replace it correctly.
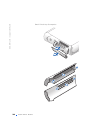
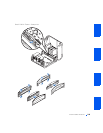
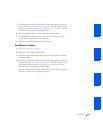
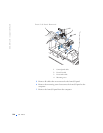
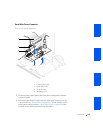
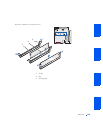
3 Remove all cables that are connected to the front I/O panel.
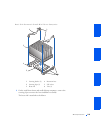
4 From inside the chassis cover, remove the mounting screw that secures
the front I/O panel to the chassis.
5 Remove the front I/O panel from the chassis.
Replacing the Front I/O Panel
To replace the front I/O panel, follow the removal procedure for your
computer in reverse.