Configuration: Premium Feature—Virtual Disk Copy 181
5
Select
Copy
Re-Copy
.
The
Re-Copy
window is displayed.
6
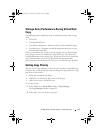
Set the copy priority.
NOTE: There are five copy priority rates available: lowest, low, medium, high, and
highest. If the copy priority is set at the lowest rate, I/O activity is prioritized, and the
virtual disk copy takes longer. If the copy priority is set to the highest priority rate,
the virtual disk copy is prioritized, but I/O activity for the storage array might be
affected.
Removing Copy Pairs
You can remove one or more virtual disk copies by using the Copy Manager.
Any virtual disk copy-related information for the source virtual disk and the
target virtual disk is removed from the Virtual Disk Properties dialog and the
Storage Array Profile dialogs. When you remove a virtual disk copy from the
storage array, the Read-Only attribute for the target virtual disk is also
removed. After the virtual disk copy is removed from the Copy Manager, you
can either select the target virtual disk as a source virtual disk or the target
virtual disk for a new virtual disk copy.
If you remove a virtual disk copy, the source virtual disk and the target virtual
disk no longer appear in the Copy Manager.
Keep these guidelines in mind when you remove copy pairs:
• Removing copy pairs does not delete the data on the source virtual disk or
target virtual disk.
• If the virtual disk copy has a status of In Progress, you must stop the virtual
disk copy before you can remove the copy pair.
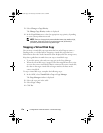
To remove copy pairs:
1
In the AMW, select
Virtual Disk
Copy
Copy Manager
.
The
Copy Manager
window is displayed.
2
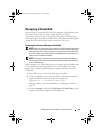
In the table, select one or more copy pairs.
3
Select
Copy
Remove Copy Pairs
.
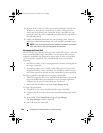
The
Remove Copy Pairs
dialog appears.
4
Click
Yes
.
book.book Page 181 Thursday, December 9, 2010 3:20 PM


