Switching the controller to RAID mode
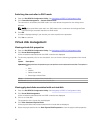
1. Enter the Dell PERC 9 Configuration Utility. See Navigating to PERC 9 Configuration Utility.
2. Click Controller Management → Switch to RAID mode.
The controller is switched to the RAID mode. You must reboot the system for the change to be
effected.
NOTE: All physical disks retain their non-RAID status until converted to Unconfigured Good
(UG) following a successful transition to RAID mode.
3. Click OK.
A screen is displayed asking if you are sure you want to perform the operation.
4. Click Yes to continue.
Virtual disk management
Viewing virtual disk properties
1. Enter the Dell PERC 9 Configuration Utility. See Navigating to PERC 9 Configuration Utility.
2. Click Virtual Disk Management.
All the virtual disks associated with the RAID controller are displayed.
3. To view the properties, click on the virtual disk. You can view the following properties of the Virtual
disk:
Option Description
Operation Displays the lists of operations you can perform on the selected virtual disk. The options
are:
• Blink
• Unblink
• Delete Virtual Disk
• Reconfigure Virtual Disks
Name Indicates the name of the virtual disk.
RAID level Indicates the RAID level of the virtual disk.
Size Indicates the size of the virtual disk.
Viewing physical disks associated with a virtual disk
1. Enter the Dell PERC 9 Configuration Utility. See Navigating to PERC 9 Configuration Utility.
2. Click Virtual Disk Management.
All the virtual disks associated with the RAID controller are displayed.
3. Click on a virtual disk.
The properties of the virtual disk are displayed.
4. Click View Associated Physical Disks.
All the physical disks that are associated with the virtual disk are displayed.
5. Select the physical disk and click View Physical Disk Properties to view the physical disk properties.
90


