


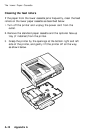
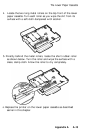
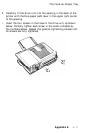

The Face-up Output Tray
5.
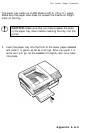
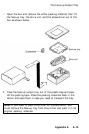
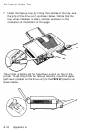
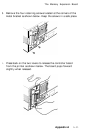
Carefully fit the drive unit into the opening in the back of the
printer with the blue paper path lever in the upper right corner
of the opening.
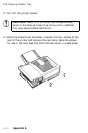
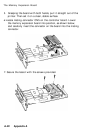
6.
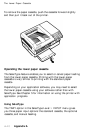
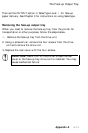
Insert the four screws in the holes in the drive unit, as shown
below. Partially tighten each screw in the order indicated by
the numbers below. Repeat this gradual tightening process until
all screws are fully tightened.
Appendix A
A-17