


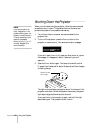


30 Fine-tuning the Projector
Adjusting Image Color and Clarity
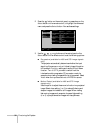
Follow these steps to get the best color and the sharpest image using
the Video menu:
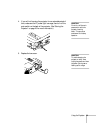
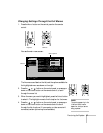
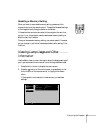
1. Press the
Menu button. You see the menu screen.
2. Press the
Select button to select the Video menu.
3. Use the , , , or buttons on the control panel or the
Select button on the remote control to set the following options:
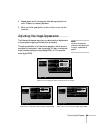
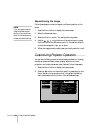
■ Black Level
Adjusts the brightness of dark areas without affecting the
white level setting. Increase (+) the setting to make dark
scenes more intense. Decrease (–) the setting to make dark
scenes less intense.
■ White Level
Adjusts the brightness of light areas without affecting the
black level setting. Increase (+) the setting to make light
scenes brighter and increase contrast. Decrease (–) the setting
to make variations in light areas more distinct and reduce
contrast.
■ Sharpness
Adjusts the sharpness of the image.
■ Color (video only)
Adjusts the color depth or intensity of the image.
■ Tint (NTSC video only)
Adjusts the balance of green to magenta in the image.
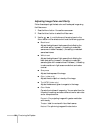
■ Color Mode
Corrects the vividness of image color. You can select from the
following five settings, and save a different one for each video
and/or computer source:
Dynamic: For projecting images with greater modulation
and intensity
Theater: Ideal for movies with lots of dark scenes
Natural: For optimizing images with natural color