


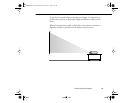
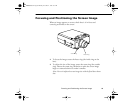


Resizing the Projected Image
71
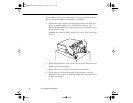
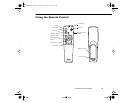
Note: You can also use the projector’s Keystone function to help get
optimum screen geometry. Adjust angle tilt optically by pressing the Optical
Keystone Adjustment knob on the side of the projector (next to the handle),
and then turning the dial clockwise or counterclockwise to move the lens up
or down. Adjust angle tilt digitally by pressing the Keystone button on
the control panel to increase or decrease the image adjustment. This feature
allows you to correct up to a ± 20° tilt, maintaining an aspect ratio of 4:3.
Using the ELP Link IV software, you can correct up to a ± 30° tilt.
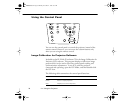
Resizing the Projected Image
The Resize button lets you select the projection method for certain
types of image signals input from a computer. Press the Resize button
on the control panel or the remote control to select one of the
following projection methods for your projector.
With images less than XGA (1024 × 768) for the PowerLite 8000i and
less than SXGA (1280 × 1024) for the PowerLite 9000i, you can either
display the image in the center of the projection area or display it full
size.
With images greater than XGA size for the PowerLite 8000i and
greater than SXGA size for the 9000i (up to 1600 × 1200 pixels), you
can project the entire image in a compressed format. If you keep
pressing the Resize button, the projector will pan around areas of the
image in the original source resolution. When displaying the full
screen, the projector automatically reduces the image size to the
projector’s maximum resolution.
Note: The Resize button cannot be used with images at XGA
(1024
×
768) resolution on the PowerLite 8000i or with images at SXGA
(1280
×
1024) resolution on the PowerLite 9000i.
80009000.book Page 71 Monday, November 1, 1999 9:35 AM