


Pressure Systems, Inc. 98RK-1 & 9816 User’s Manual©
Page 9 www.PressureSystems.com
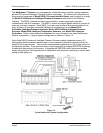
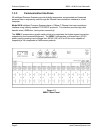
2.3.3 Network Communications Hookup
The 98RK-1 Scanner Interface Rack chassis has an Ethernet connector port on the rear of
the unit through which all scanners in the rack may be connected to the network or the Ethernet
card in your PC or work station. This port is labeled “ TO HOST” (using an RJ-45 connector).
Similarly, every Model 9016, 9116, 9021, or 9022, 903x and 9046, has an Ethernet connecting
port using TCP/IP transmission protocol through their single circular connector.
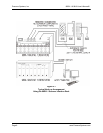
STEP 3
If required, install an Ethernet card in your computer.
STEP 4
Set up or confirm the TCP/IP protocol and address of the host computer as shown in
the following steps.
Communications via Ethernet using TCP/IP protocol uses module address designations and
requires the host computer to have a compatible address.
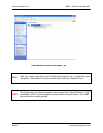
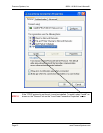
STEP 5
Find the “Network Connections” icon on "Control Panel." Double-click the icon to
arrive at the "LAN or High Speed Internet" screen. Find the "Local Area Connection"
icon and select it (Left click). Select “Properties” from the "Local Area Connection" by
right clicking the icon. A screen example is shown on the next page.
Note
All of the screen examples in this User's Manual are from
Windows
®
XP operating system. If you are using a different
operating system and need assistance in setting up your
network, contact the Applications Support Group at
Pressure Systems.
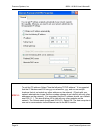
STEP 6
Scroll down the “Local Area Connection” tab to ensure that "Internet Protocol TCP/IP"
is available. NOTE: a dial-up adapter may also exist for internet access. This is NOT
the protocol that is being verified.