Operation, cont’d
CrossPoint 450 Plus and MAV Plus Switchers • Operation
3-40
PRELIMINARY
Locking out the front panel (Executive mode)
N
In a system with multiple front panel controllers, Extron recommends locking
the front panel of BMEs other than BME 0 to prevent confusion.
The front panel security lockout limits the operation of the switcher system from
the front panel controller. When the switcher is locked, all of the front panel
functions are disabled except for the View-Only mode functions. See Viewing a
confi guration on page 3-16. Other than in View-Only mode, if the user pushes a front
panel button when the switcher is locked, the RGBHV (CrossPoint 450 Plus) or
Video (MAV Plus) and Audio buttons fl ash twice and return to their previous state.
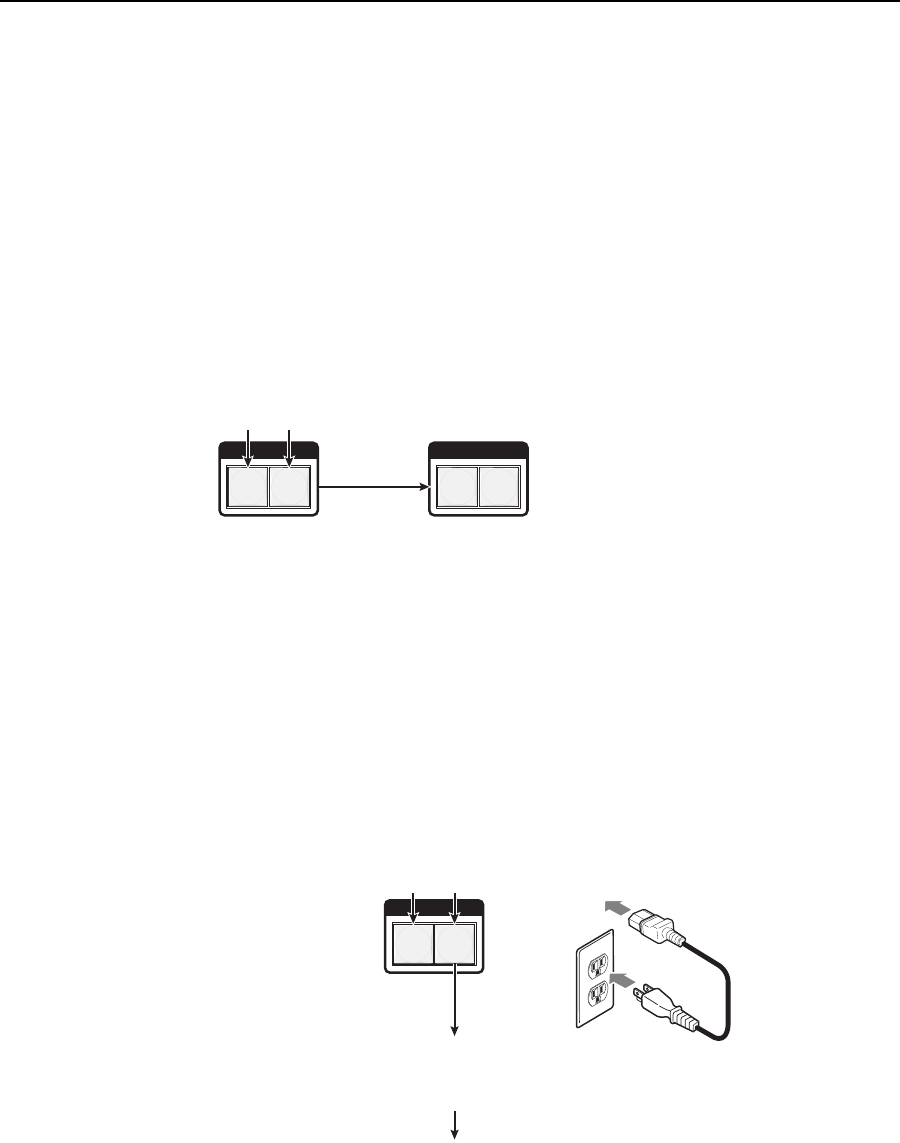
To toggle the lock on and off, press and hold the RGBHV (CrossPoint 450 Plus) or
Video (MAV Plus) button and the Audio button for approximately two seconds
(fi gure 3-64).
I / O
VIDEO AUDIO
I / O
VIDEO AUDIO
Press and hold the RGBHV /Video
and Audio buttons simultaneously
to toggle executive mode on or off.
2 seconds
The RGBHV/ Video
and Audio buttons
blink twice to indicate
the mode change.
Release the buttons.
Figure 3-64 — Toggle front panel lock on or off
Performing a system reset from the front panel
The front panel reset is identical to the
E
ZXXX
}
SIS command (see chapter 4,
SIS Programming and Control). A system reset clears all ties and presets, all video
and audio mutes, resets all I/O grouping, sets all input audio levels to unity gain
(+0 dB), and sets all output volume levels to 100% (0 dB of attenuation).
Reset the switcher to the factory default settings by pressing and holding the
RGBHV (CrossPoint 450 Plus) or Video (MAV Plus) button and Audio button while
you apply AC power to the switcher (fi gure 3-65).
N
System reset does not reset the Internet protocol (IP) settings or replace user-
installed fi rmware.
Power
I / O
VIDEO AUDIO
Press and hold the RGBHV/Video and Audio buttons while you apply
power to the switcher.
The switcher flashes the button indicators green, red, and
amber and then turns them off.
Continue to hold the RGBHV/Video and Audio buttons until all input and output buttons return to
either unlit or to background illumination and the RGBHV or Video and Audio buttons turn on.
Release the RGBHV/Video and Audio buttons.
Figure 3-65 — System reset
