


IPL T S Series • Installation and Operation
2-4
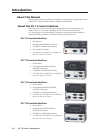
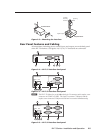
Installation and Operation, cont’d
IPL T
S2
1
R
100
COM
TX
LINK
ACT
2
RX
RTS
CTS
IPL T
S2
1
R
100
COM
TX
LINK
ACT
2
RX
RTS
CTS
MDA SERIES
DISTRIBUTION AMPLIFIER
®
®
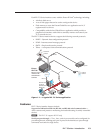
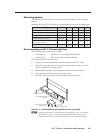
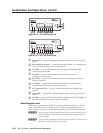
Figure 2-2 — Mounting the interface on the standard shelf
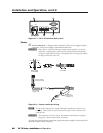
Furniture or projector mounting
The following furniture and projector mount kits are available:
• PN 70-077-01 Furniture mount kit (for IPL T S1)
• PN 70-077-04 Projector mount kit (for IPL T S1)
• PN 70-212-01 Furniture mount kit (for IPL T S2, S4, S6)
• PN 70-217-04 Projector mount kit (for IPL T S2, S4, S6)
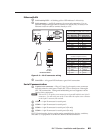
To mount an IPL T S Series device to furniture:
1. If present, remove the rubber feet from the bottom of the IPL T S unit.
2. Attach the furniture mounting brackets to the unit with the supplied screws.
3. Hold the unit with the attached brackets against the underside of the
furniture. Mark the hole locations of the bracket on the mounting surface.
4. Drill 3/32-inch (2 mm) diameter pilot holes, 1/4 inches (6.3 mm) deep in the
underside of the mounting surface at the marked hole locations.
5. Insert #8 wood screws into the four pilot holes. Tighten each screw until just
less than 1/4 inches (6.3 mm) of the screw head protrudes above the surface.
6. Hang the mounting bracket over the protruding screw heads. Slide the
mounting brackets to the narrow end of the screw slots and tighten the
mounting screws.
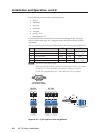
To mount an IPL T S Series device with a projector:
1. If present, remove the rubber feet from the bottom of the IPL T S unit.
2. Attach the projector mounting bracket to the unit with the supplied screws.
3. Secure the unit to the projector post with the supplied mounting bolt.