


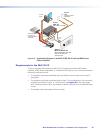
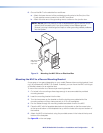
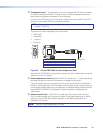
6. Ground the MLC to the electrical box as follows:
a. Attach the bare wire end of the provided grounding wire to the Gnd pin of the
6-pole captive screw connector on the MLC rear panel.
b. Attach the other end of the grounding wire to a screw on the junction box.
NOTE: Do not ground a product to both a separate earth ground and the circuit
ground (via a connector pin). If you tie a product to two different ground
sources, you may introduce ground loops or other grounding-related problems
into the system.
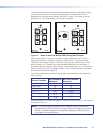
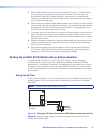
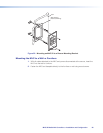
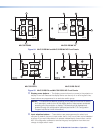
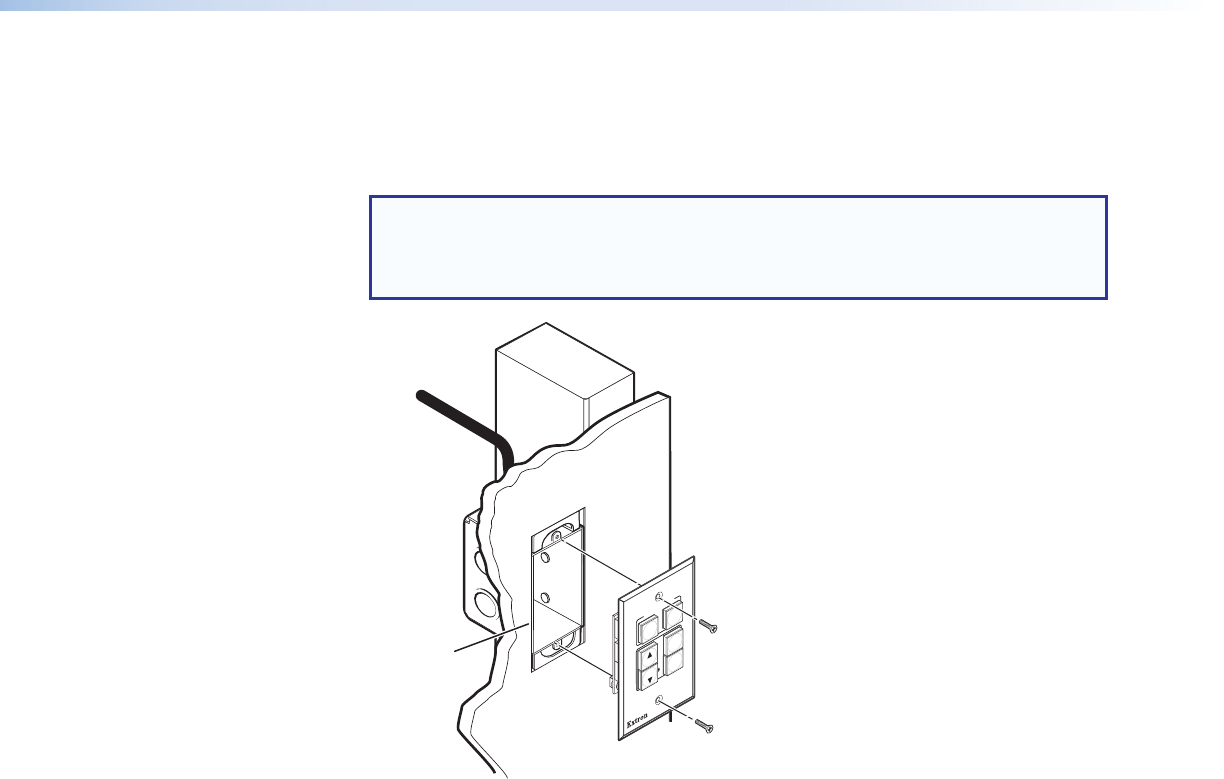
Wall opening
is flush with
edge of box.
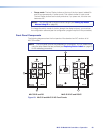
MLC 52
MLC 52
PROJECTOR
OFF
ON
VIDEO
VOL
VOL
PC
Figure 21. Mounting the MLC 52 to an Electrical Box
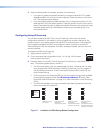
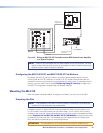
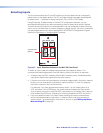
Mounting the MLC to a Decora Mounting Bracket
A one-gang or two-gang (depending on your model) Decora style mounting bracket (“mud
ring”) is provided with the MLC 52 models. If desired, you can mount the MLC to this type
of bracket instead of to an electrical box.
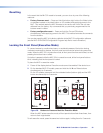
To mount the controller to a Decora style mounting bracket:
1. Cut a hole in the mounting surface large enough to accommodate the provided
mounting bracket.
2. Insert the mounting bracket into the hole.
3. Turn the two screws on the bracket so that the locking arms rotate behind the
mounting surface until they clamp securely to it. Do not overtighten.
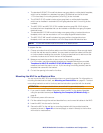
4. Run the cables through the mounting bracket and attach them to the MLC.
5. Place the MLC with its faceplate attached onto the bracket so that the screw holes
at the top and bottom of the faceplate line up with the holes at the top and bottom of
the bracket.
6. Attach the MLC to the bracket, using the provided screws in the holes at the top and
bottom of the faceplate.
See figure 22 on the next page.
MLC 52 MediaLink Controllers • Installation and Configuration 25