4. USAGE OF PRINTER DRIVER
37
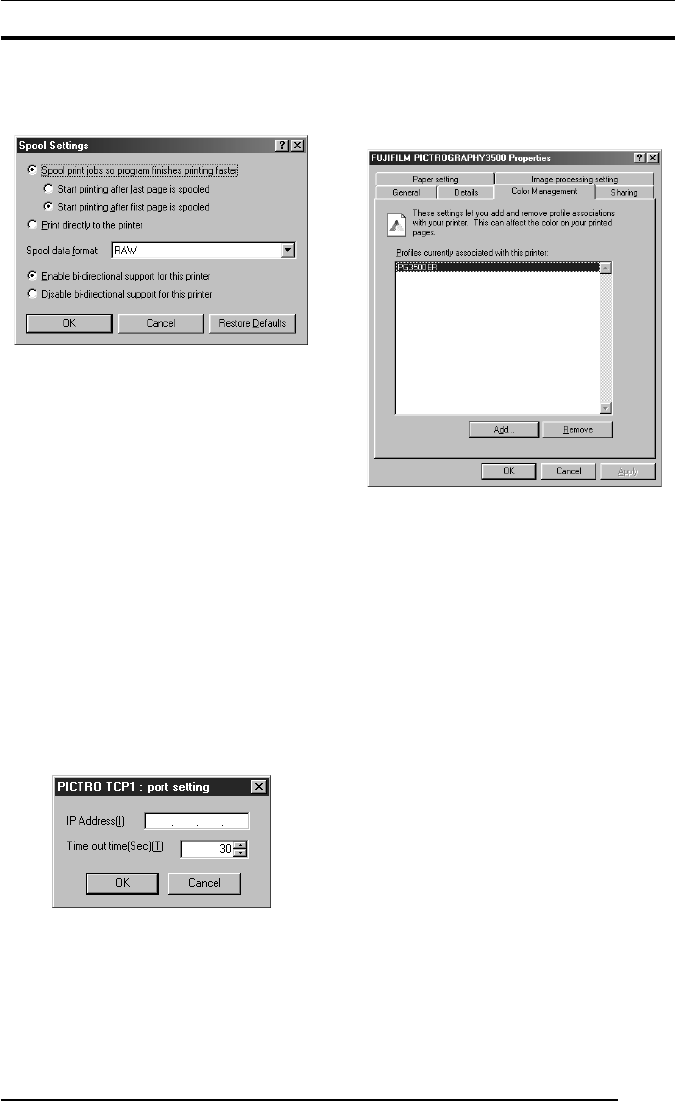
• [Spool Settings...] button
Click this button to change print spool settings.
Clicking the button displays the following window.
No changes need to be made here under normal circumstances.
• Spool print jobs so program finishes printing faster
Spooling a document immediately writes the document print
data to the hard disk, then sends this data to the printer, quickly
releasing an application from print processing.
You can set both the spooling method and spooled data for-
mat.
• Print directly to the printer
Print data is sent directly to the printer, without spooling. This
may tie up the application until printing is complete.
We recommend spooling print data unless doing so poses spe-
cific problems.
This option is disabled for shared printers.
• Enable bi-directional support for this printer
Selecting this option enables bi-directional communication
between a printer and computer.
* Be sure to choose [Support] with the PICTROGRAPHY
3500/4000
2/4500 printer driver.
• Disable bi-directional support for this printer
Selecting this option disables bi-directional communications
between a printer and computer.
• [Set Port...] button
Click this button to change the print destination port.
When the print destination port is [PICTRO TCPx:
(FUJIFILM PICTRO TCP Port)] (x: numerical value entered
as the port name), the [PICTRO TCPx: Port Setup] window
opens at the click of the button.
• IP address
Specify the IP address for the PICTROGRAPHY network adapter
that is the print destination. If the IP address for the
PICTROGRAPHY network adapter is changed or you want to make
such a change as to print onto the PICTROGRAPHY that is con-
nected to another PICTROGRAPHY network adapter, change the
value in this field and click the [OK] button.
•Timeout time (in seconds)
The timeout time (in seconds) for TCP/IP protocol communi-
cation is to be entered in this field. This setting need not be
changed under normal conditions.
4. Color Management (Windows 98 only)
Click the [Color Management] tab on the [FUJIFILM
PICTROGRAPHY3500 (4000
22
22
2 or 4500) Properties] dialog
box.
The following screen appears:
Here, you can add or delete profiles related to the printer.
Note that profiles for the PICTROGRAPHY 3500/4000
2/4500
were added when the printer driver was installed.
Profile for the PICTROGRAPHY3500: PG3500ER
Profile for the PICTROGRAPHY4000
2: PG4K2ER2
Profile for the PICTROGRAPHY4500: PG4500ER
Under normal conditions, these settings should not be altered.
4.1.5.2 Windows NT 4.0
1. Paper setting (Default value)
Click to select [Setting] > [Printer] from the [Start] menu. This
opens the [Printers] folder window. Click the [FUJIFILM
PICTROGRAPHY3500 (4000
22
22
2 or 4500) TCP] icon, then
select [Properties] on the [File] menu.
The [FUJIFILM PICTROGRAPHY3500 (4000
22
22
2 or 4500)
TCP Properties] dialog box is displayed.
Click the [Paper setting] tab.
For information on setup items, see “4.1.2 Print setup and print-
ing”.
The settings entered here are assumed as default values for the
application software [Print] command.
2. Image processing setting (Default value)
Click the [Image processing setting] tab on the [FUJIFILM
PICTROGRAPHY3500 (4000
22
22
2 or 4500) TCP Properties]
dialog.
For information on setup items, see “4.1.2 Print setup and print-
ing”.
The settings entered here are assumed as default values for the
application software [Print] command.


