Getting Connected Remotely 53
Ethernet card. You must have an NE2000-compatible Ethernet card. The drivers for
the card already exist on your PenCentra 200.
1. Insert the Ethernet card into your PenCentra 200 and connect it to your network
cable.
2. You may see a message warning about battery power. If you have an A/C
Adapter, plug it into your PenCentra 200.
3. Perform one of the following steps, depending upon whether the Settings
dialog box opens automatically.
• If the Settings dialog box is displayed automatically, enter the information
for your server. See your network administrator if you need assistance. You
should not have to change these settings.
• If the Settings dialog box is not displayed automatically, go to Start,
Settings, Control Panel, and double-tap or double-click Network. Select
your Ethernet driver and select Properties.
4. Select Start, Settings, Control Panel, and double-tap or double-click Network.
In the Identification tab, enter your name, password, and domain.
Once connected, you can use Pocket Internet Explorer to visit intranet Web pages
and Inbox to send and receive e-mail. Before you can use Inbox, you need to
provide the information it needs to communicate with the mail server. For specific
instructions, see “Inbox: Sending and Receiving E-mail Messages” in Chapter 5.
Connecting to Your Desktop to Synchronize Remotely 3
To synchronize remotely, the following conditions must be met:
• You must first establish a partnership between your PenCentra 200 and desktop
computer while at your desktop computer.
• The desktop computer must be turned on and you must be logged in. Schedule+,
Exchange, or Outlook must be running with your user profile.
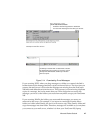
• In the lower-right corner of the Mobile Devices window, the connection status
must show Waiting for mobile device to connect.
• In the ActiveSync Options dialog box in Windows CE Services, synchronization
must be enabled. (Or you can select Automatically synchronize if data is
out-of-date.)


