


Procedure 4: Mount the Hub into a Rack (Optional) 27
Installation
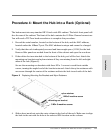
Procedure 4: Mount the Hub into a Rack (Optional)
The hub mounts into any standard HP 19-inch wide EIA cabinet. The hub’s front panel will
face the rear of the cabinet. The front of the hub contains the 10 Fibre Channel connectors.
You will need a T25 Torx head screwdriver to complete this procedure.
1. Record the serial number, located on the bottom of the hub, and the MAC address,
located under the 10Base-T port. The MAC address is unique and cannot be changed.
2. Verify that the rack is adequately secured and has enough space (1 EIA) for the hub.
Remove filler panels as needed from the front of the cabinet and open the rear door.
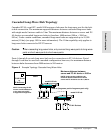
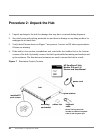
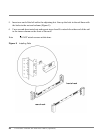
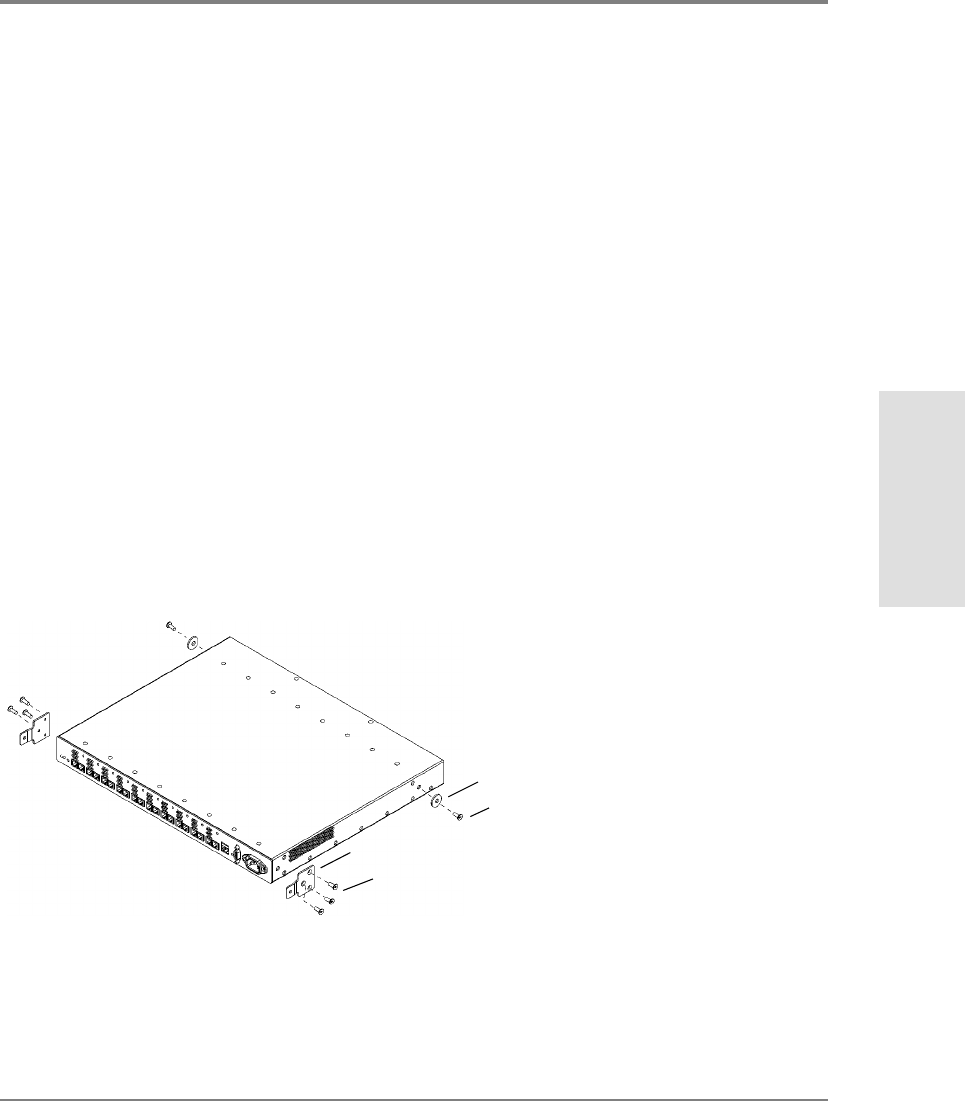
3. If the rubber feet are attached to the bottom of the hub, peel off the feet. Attach the
mounting ear brackets and nylon retainers if they are missing from the left and right
sides of the hub (Figure8).
Secure the mounting ear brackets with three M3 x .5 screws to each front outside
corner, turning the angled end of the bracket outward. Attach the nylon retainers with
one screw through the center of the retainer and into the hole in each side of the hub.
Figure 8 Replacing Mounting Ear Brackets and Nylon Retainers
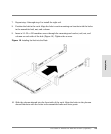
4. Slide a sheet metal nut onto the outer column in the back of the rack. Make sure to align
the hole in the nut with the hole at the selected EIA location on the column.
3 M3x.5 machine screws
mounting ear bracket
1 M3x.5 machine screw
nylon retainer