


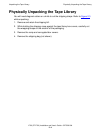
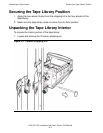
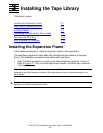

Unpacking the Tape Library
L700 (CTL700) Installation and User’s Guide—527338-004
2-6
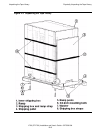
Removing the Tape Library From the Pallet
Removing the Tape Library From the Pallet
To remove the tape library from the pallet:
1. Obtain a 3/4-inch (or adjustable) wrench or socket to remove the four 3/4-
inch bolts that secure the tape library to the pallet.
2. Remove the four wood blocks positioned near the bolts.
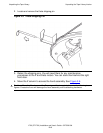
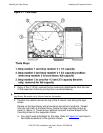
3. See Figure 2-3
. Position the ramp by aligning the holes of the ramp on the
two posts on the pallet.
4. Secure the seat of the ramp on the two posts.
5. With someone on each side of the tape library, carefully guide it down the
ramp.
6. Remove the ramp and pallet from the work area. Dispose of the shipping
materials or re use them according to your local policies.
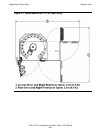
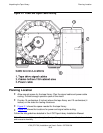
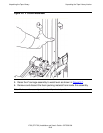
Positioning the Tape Library
1. Carefully roll the tape library to its assigned location.
2. Position the tape library to allow space for maintenance and operator
access. Figure 2-1
shows these space requirements.
3. If installation will require the cables to be routed under a raised floor, check
that the floor cutouts are in the correct positions.
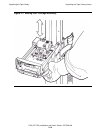
Removing the Shipping Kit
1. Use a Phillips screwdriver on the right side door latches to turn each screw
counterclockwise and release the latches.
2. Lift both latches up and turn them both counterclockwise to release them
and open the right side door.
3. Open the installation kit and remove the door key for the tape library from
the kit.
4. Open the right front door.
5. For each key slot in the left access door, insert the door key and turn it
counterclockwise.
6. Open the left door.
Note. If shipping agreements require the shipper to remove the tape library from its shipping
pallet, skip this section.
Caution. At least two people are required to remove the tape library from its shipping pallet.