


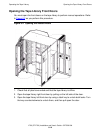
Operating the Tape Library
L700 (CTL700) Installation and User’s Guide—527338-004
6-6
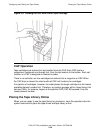
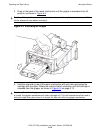
Ejecting Cartridges Through the CAP
Ejecting Cartridges Through the CAP
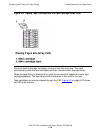
To unlock the CAP, open the CAP, and remove the cartridges from it:
1. At the console, enter the VOLSERs of the cartridges that are required. The robot
retrieves the cartridges and inserts them in the CAP.
2. Enter the console command to open the CAP. This unlock the CAP.
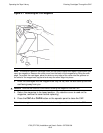
3. Press CAP A or CAP B button on the operator panel to open the CAP.
4. Remove or pull down the magazine and remove the cartridges. Store them outside
the tape library.
5. Repeat these steps until all the required cartridges have been removed.
6. Press the CAP button to close the CAP.
7. For further instructions, refer to the console and software documentation.
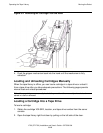
Cleaning a Tape Drive Manually
If the Auto Clean function for the tape library is not enabled, the tape library status
screen on the operator panel displays “Clean Needed” whenever a specific tape drive
needs cleaning. To clean this tape drive:
1. Enter the console command to open the CAP. This unlocks the CAP.
2. Press the CAP button on the operator panel to open the CAP.
3. Insert the required cleaning cartridge in the CAP.
4. Press the CAP button to close the CAP.
5. Press the MENU button until the Main menu displays.
6. Press the arrow button to select DIAGNOSTICS.
7. Press the SELECT button. The panel displays Main Diagnostics menu.
8. Press the arrow buttons to select DRIVE DIAGNOSTICS.
9. Press the SELECT button. The screen displays a list of all installed tape drives.
10. Use the arrow buttons to select the tape drive.
11. Press the SELECT button. The Diagnostic for Drive menu appears.
12. Press the arrow button to select CLEAN DRIVE.
13. Press the SELECT button. A message indicates that the tape drive will be cleaned
at the next opportunity.
14. When the cleaning is complete, the robot returns the cleaning cartridge to the CAP.
15. To clean another tape drive of the same type, press the MENU button to return to
the lists of tape drive, and repeat Steps 10 through 14.