


5 - 4
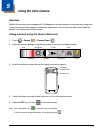
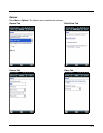
Taking a picture using the Windows Embedded Handheld 6.5 Camera tool
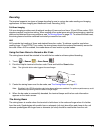
1. Touch > Pictures & Videos > Camera
2. Point the terminal's camera lens at the object you want to capture.
Note: The camera lens is located on the back panel of the terminal.
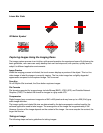
3. Center the object you want to take a picture of on the live preview screen. Adjust the camera
settings or let the camera auto-focus.
Note: Focus On is the default Focus mode. In this mode, the camera performs auto-focus while it is in preview
mode but not during picture capture.
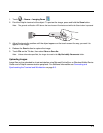
4. Press the ENT button to capture the photo.
5. The touch screen displays the captured photo. Touch OK or Camera on the Tile Bar to return to the
active viewfinder screen.
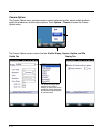
Menu
Touch Menu on the Tile Bar at the bottom of the touch screen to adjust the camera settings, switch to
video mode, and access additional camera options.
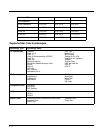
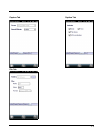
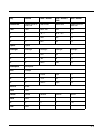
Item Descriptions
Video Activate Video Mode
Mode Set Mode (i.e., Normal, Burst, or Timer)
Resolution Set Picture Resolution (i.e., QVGA, VGA, SVGA, XGA, UXGA, QXGA, or MEGA5)
Zoom Set Zoom (i.e., x1, x2, or x3)
Flash Set Camera Flash On or Camera Flash Off
Focus Set Focus Off, Focus On (default), Focus on Trigger, or Fixed-Focus
Focus On (default setting):
The camera auto-focuses while it is in preview mode. As you move the camera, the lens
targets and auto-focuses on different objects. Once the picture is in focus in preview
screen, the camera is ready for the picture to be taken. To reduce the capture time of the
photo, the camera does not auto-focus during picture capture process.
Focus on Trigger:
The camera auto-focuses while it is in preview mode and again during picture capture.
The Focus on Trigger lengthens the capture time of the photo.
Brightness Set the brightness setting from +2.0 EV to -2.0 EV in .5 EV increments
Full Screen Switch to full screen mode (Tap screen to exit full screen mode)
Options Set Camera Options, Video Options, Slide Show Options or General Options