2-6 701344-003
Customer Installation
Conducting the Preliminary Operating Test
1) Ensure that the system control unit is powered on and operational.
2) Turn the Power On/Off switch to Off (O) .
3) Set the Power-On/Off switch to On ( | ) while simultaneously holding down the
space bar. After a few seconds, an alarm sounds.
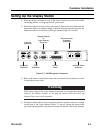
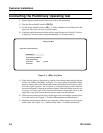
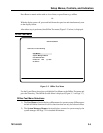
4) Continue to hold the space bar down until a screen like the one in Figure 2-2, below,
is displayed. You may need to adjust the Brightness or Contrast control.
Figure 2-2. Offline Test Menu
5) If the display station is designated to operate with settings other than the default
modes, see “Offline Test Menu” on Page 3- 5 for a description of the Offline Setup
menus to change the modes. Obtain the settings designated for the display station
from the system operator. The controller to which the display station attaches
must be configured to support the settings selected. When the display station is set
correctly, it is ready to go online. Press the Reset key to display the cursor in the
upper left corner of the screen and the operator status row at the bottom.
6) If the screen does not have the cursor in the upper left corner and the operator status
row at the bottom, see Chapter 7, “Problem Determination and Maintenance.”
7) Installation of the display station is now complete. Certain settings may be changed
while online. See Figure 3-11, “Online Screen Menu” for further information.
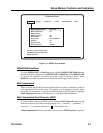
Offline Test Menu
Select One of the Following
User Menus
System Manager Menus
Product ID 1483V (c)1995
Go Online
User Defined Data


