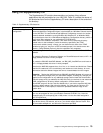
Using the Supplementary CD
The Supplementary CD contains documentation and copies of key software
applications that are preinstalled on your NAS 200. Table 13 includes the names of
the directories found on the Supplementary CD and a description of the contents of
the directory.
Table 13. Supplementary CD directories
Directory Name Contents
IBM Advanced Appliance
Configuration
IBM Advanced Appliance Configuration console and agent installation files. The IBM
Advanced Appliance Configuration agent is preinstalled as a Windows Powered service
on the NAS 200. To install the Advanced Appliance Configuration console (on another
network-attached workstation running Windows 98, Windows NT, or Windows 2000),
run lpv2setup.exe from the x:\IBM Advanced Appliance Configuration directory, where x
is the drive letter assigned to your workstation’s CD-ROM drive.
Note: When the installation completes, it will leave behind a temporary directory
named iaacu on the workstation, under the directory specified by the TEMP
environment variable (usually c:\temp; you can determine the value of the TEMP
variable by typing set temp from a DOS command prompt). You should remove this
directory (using Windows Explorer) after the installation has completed.
DiskImages Diskette images for the Recovery Enablement Diskette and the IBM NAS AutoRAID
diskette.
To create the Recovery Enablement Diskette, run RecovDsk.bat and insert an HD 1.44
floppy diskette into drive A: when prompted.
To create the IBM NAS AutoRAID diskette, run IBM_NAS_AutoRAID.exe and insert an
HD 1.44 floppy diskette into drive A: when prompted.
Note that the NAS 200 supports three, four, five, or six internal hard disk drives. Please
read the file readme.txt in the root directory and readme.txt in this directory for more
information about the diskette images and how to create diskettes from the images.
Attention: Starting the NAS 200 with the IBM NAS AutoRAID diskette will remove all
RAID configuration changes from your ServeRAID adapter, including any changes you
applied to the configuration for any additional storage (internal hard disk drives and/or
external storage units) you added to the NAS 200 since you received it, and restore the
RAID configuration to its factory default configuration. All data stored in your
ServeRAID arrays will be lost. Use this diskette only if you want to reset the NAS 200
to factory default settings. After using the diskette, you must use the Recovery CD
(described earlier in this chapter) to restore the preloaded software image on the
system drive.
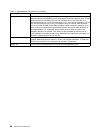
I386 Windows Powered installation files. If you add device drivers, OS features, and so on,
you may be prompted to insert your Windows Powered CD-ROM. If so, insert the
Supplementary CD, and specify path x:\i386, where x is the drive letter assigned to
your CD-ROM drive.
W2KSP2 Windows Powered Service Pack 2, which is preloaded on your NAS 200. If you add
any device drivers, OS features, and so on, you should reapply Service Pack 2. Run
the executable w2ksp2.exe, and follow the instructions provided.
Chapter 8. Using the Recovery and Supplementary CDs 79


