Chapter 3. Configuring your server 19
Using the PXE Boot Agent Utility program
The Preboot eXecution Environment (PXE) Boot Agent is a built-in, menu-driven
configuration utility program that you can use to:
• Change network startup (boot) protocols
• Change network startup (boot) order
• Set menu wait times
• Select operating system wake up support
Starting the PXE Boot Agent Utility program
The following sections provide the instructions needed to start the PXE Boot Agent
Utility and descriptions of the available menu choices.
To start the PXE Boot Agent Utility program, do the following:
1. Turn on the server.
2. When the <Initializing Intel (R) Boot Agent version X.X.XX PXE 2.0 Build
XXX (WfM 2.0) prompt appears, press Ctrl+S.
Note: By default, you will have two seconds after the prompt appears on the
screen to press Ctrl+S.
3. Use the arrow keys or press Enter to select a choice from the menu:
• Press Esc to return to the previous menu.
• Press the F4 key to exit.
4. Follow the instructions on the screen to change the settings of the selected items;
then, press Enter.
Choices available from the PXE Boot Agent menu
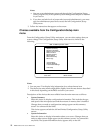
The following choices appear on the PXE Boot Agent Utility menu:
• Network Boot Protocol
PXE is the default value for this menu item.
Note: Do not change this value. There are no other network boot protocols
supported.
• Boot Order
Select this choice to change the order in which boot devices are queried.
— Try local drives first, then network (default)
— Try network only
— Try local drives only
— Try network first, then local drives
• Show setup prompt
Select this choice to either display the PXE setup prompt or disable it. Disable is
the default setting.
When this choice is enabled, Press Ctrl+S to enter the setup menu will appear
on the screen under the initializing prompt.


