


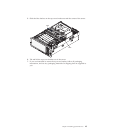
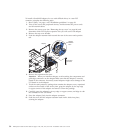
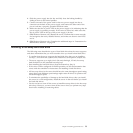
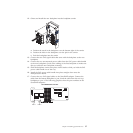

4. Slide the power supply into the bay and fully close the locking handle by
sliding it down to the locked position.
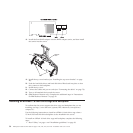
5. Connect one end of the power cord for the new power supply into the ac
connector on the back of the power supply, and connect the other end of the
power cord into a properly grounded electrical outlet.
6. Make sure that the ac power LED on the power supply is lit, indicating that the
power supply is operating correctly. If the server is turned on, make sure that
the dc power LED on the top of the power supply is lit also.
7. (IBM Business Partners only) Restart the server. Confirm that it starts correctly
and recognizes the newly installed devices, and make sure that no error LEDs
are lit.
8. (IBM Business Partners only) Complete the additional steps in “Instructions for
IBM Business Partners” on page 29.
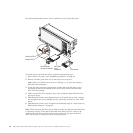
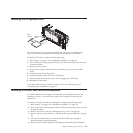
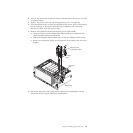
Installing a hot-swap hard disk drive
The following notes describe the types of hard disk drives that the server supports
and other information that you must consider when you install a hard disk drive:
v To confirm that the server supports the hard disk drive that you are installing,
see http://www.ibm.com/systems/info/x86servers/serverproven/compat/us/.
v The server supports up to eight 1-inch (26 mm) slim-high, 2.5-inch, hot-swap
hard disk drives in the standard hot-swap bays.
v Start installing the hard disk drives from the bottom bay (bay 0).
v If the server will be configured for RAID operation, see the documentation that
comes with the controller for instructions for installing a hard disk drive.
v All hot-swap drives in the server should have the same throughput speed rating;
using drives with different speed ratings might cause all drives to operate at the
lowest throughput speed.
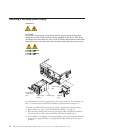
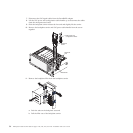
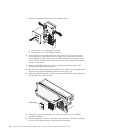
v To minimize the possibility of damage to the hard disk drives when you install
the server in a rack configuration, install the server in the rack before you install
the hard disk drives.
v You do not have to turn off the server to install hot-swap drives in the hot-swap
drive bays. However, you must turn off the server when you perform any steps
that involve installing or removing cables.
Chapter 2. Installing optional devices 53