


Completing the installation
To complete the installation, complete the following steps:
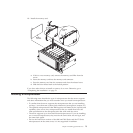
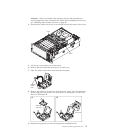
1. If you removed the front bezel, slide the bezel onto the front of the server
chassis.
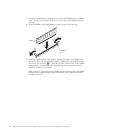
2. If you removed the top-cover bracket, reinstall it. Slide the blue latches into the
locked position.
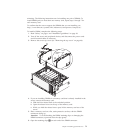
3. Place the top cover over the top of the server.
4. Slide the top cover forward; then, press down on the cover handle until it
clicks into place.
5. Connect the cables and power cords to the rear of the server. For more
information, see “Connecting the cables.”
6. Start the server. Confirm that it starts correctly and recognizes the newly
installed devices, and make sure that no error LEDs are lit.
7. (IBM Business Partners only) Complete the additional steps in “Instructions for
IBM Business Partners” on page 29.
Connecting the cables
Notes:
1. Be sure to turn off the server before you connect any cables to or disconnect
any cables from the server.
2. Detailed cabling information is available in the Rack Installation Instructions that
came with your server or the Installation Instructions that came with any cable
kits.
3. For additional cabling instructions, see the documentation that comes with the
optional devices. It might be easier for you to route any cables before you
install certain optional devices.
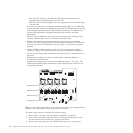
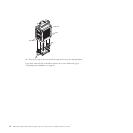
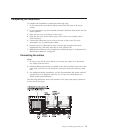
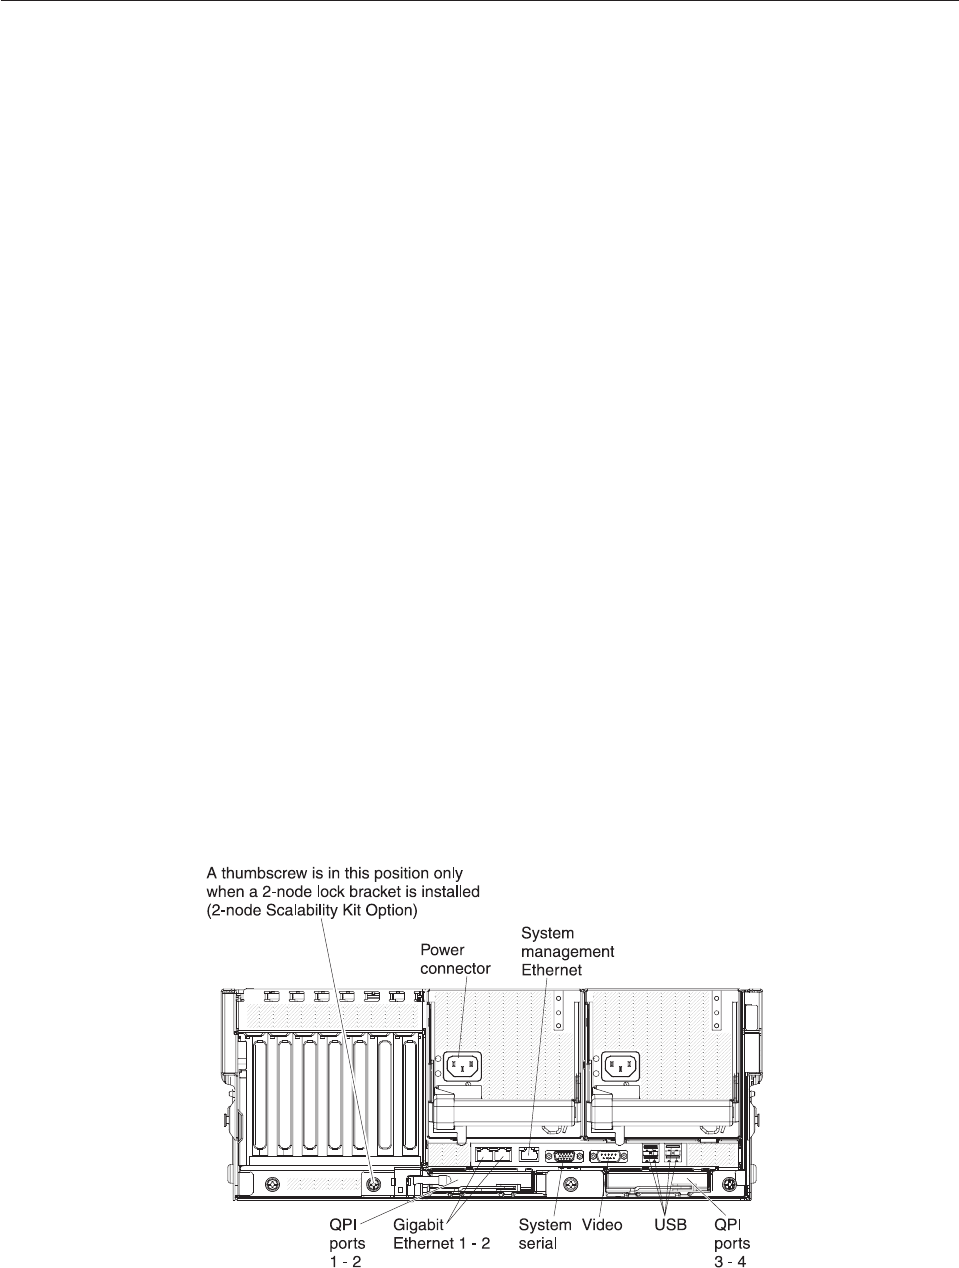
The following illustration shows the locations of the input and output connectors
on the rear of the server.
Chapter 2. Installing optional devices 79