


a. Remove the static-protective bag, and the foam surrounding the bag, from
the box.
b. Touch the static-protective bag that contains the new microprocessor to
any unpainted metal surface on the outside of the server.
c. Carefully remove the microprocessor from the static-protective bag,
touching only the edges of the microprocessor.
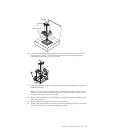
d. If there is a plastic protective cover on the bottom of the microprocessor,
carefully remove it.
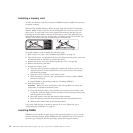
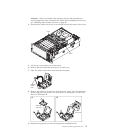
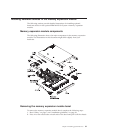
Microprocessor
Protective
cover
e. Put the microprocessor back in the box, component side down on the solid
piece of foam.
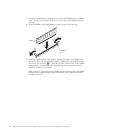
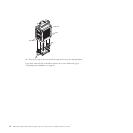
f. Locate the microprocessor installation tool that comes with the new
microprocessor.
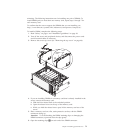
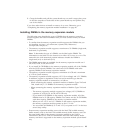
Note: If you are installing E7 series microprocessors in your server, you
must use the microprocessor installation tool with the text "X7500 + E7" on
the bottom of the tool (see the following illustration). Tools that do not
have this text on the bottom will not work correctly with the E7 series
microprocessors.
X7500
+
E7
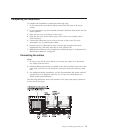
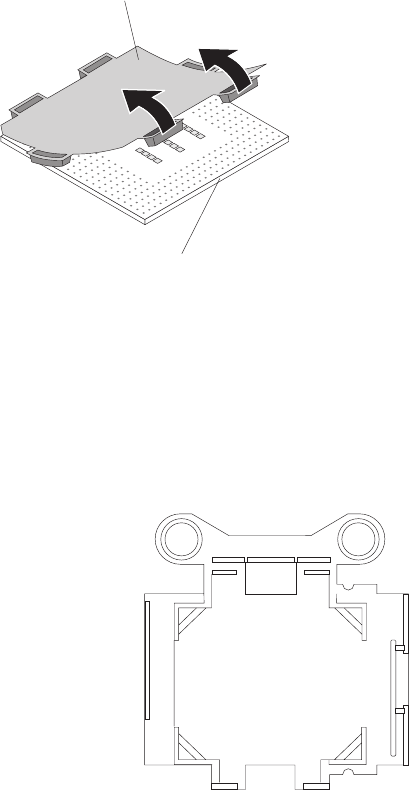
g. Twist the handle of the installation tool counterclockwise so that it is in the
open position.
h. Using the triangle on the microprocessor to align it with the installation
tool, place the microprocessor on the underside of the tool.
i. Twist the handle of the installation tool clockwise to secure the
microprocessor in the tool.
Note: You can pick up or release the microprocessor by twisting the
microprocessor installation tool handle.
76 IBM System x3850 X5 and x3950 X5 Types 7145, 7146, 7143, and 7191: Installation and User's Guide