TM700 User Guide - Upgrading Your System
4 - 15
Installing a 3.5-inch Floppy Disk Drive
To install a 3.5-inch floppy disk drive in the upper 3.5-inch slot of the 3.5/5.25-inch
bracket:
1. Remove the right side door. See “Removing the Right Side Door:” on page 6.
2. Remove the front panel. See “Removing the Front Panel:” on page 8.
3. Remove the 3.5/5.25-inch bracket. See “Removing the 3.5/5.25-inch Bracket:”
on page 9.
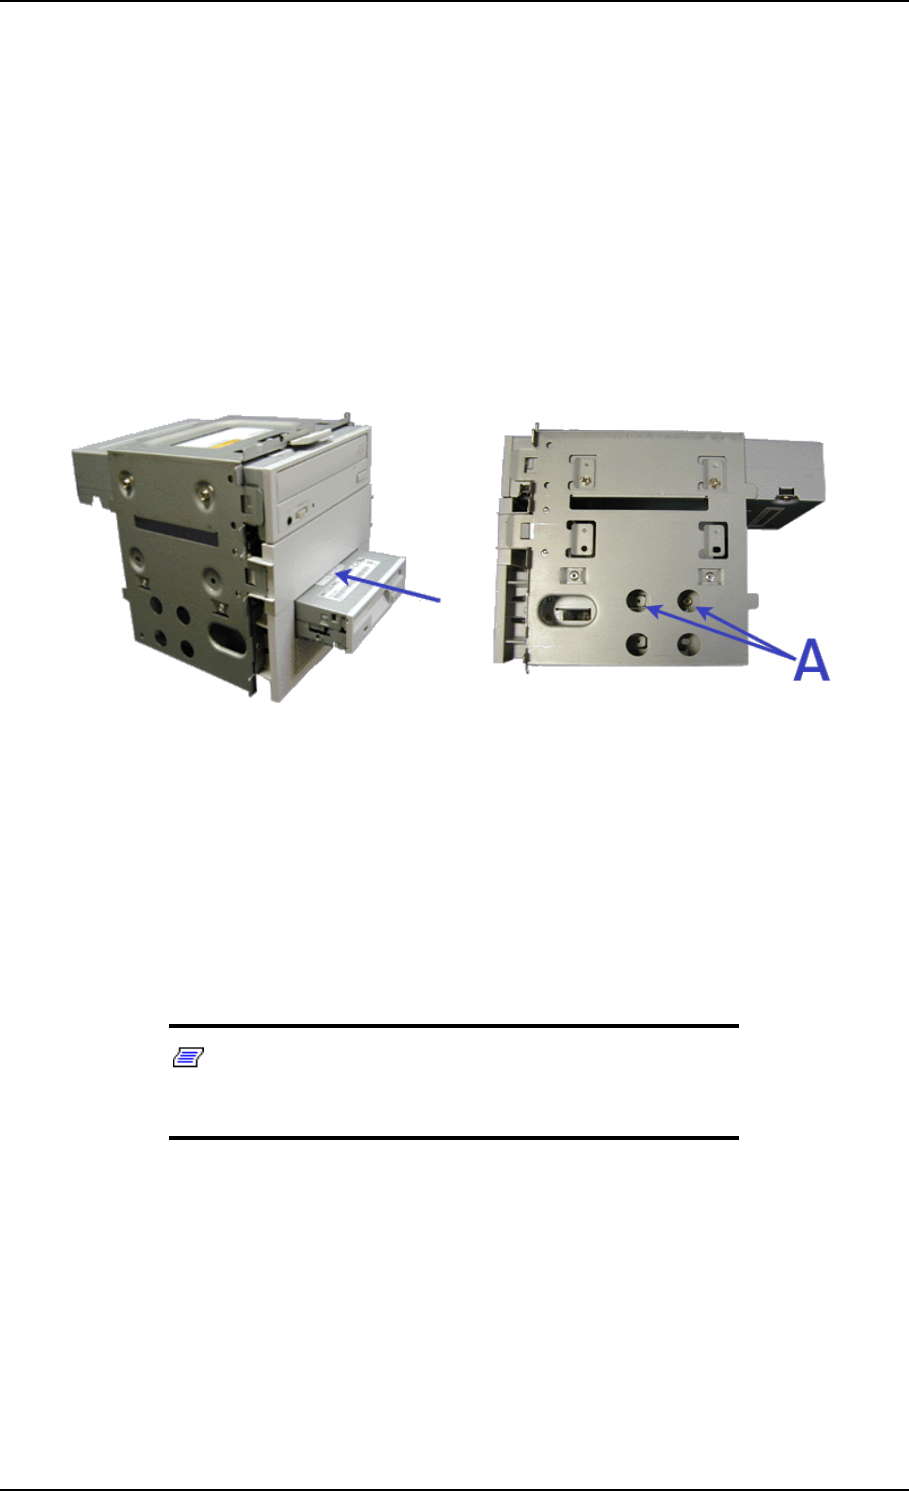
4. Slide the floppy disk drive into the upper slot of the bracket until the three screw
holes (A - two on the left side and one on the right side) are lined up, and secure
three screws.
Figure 4 - 14 : Installing a 3.5-inch Floppy Disk Drive
5. Replace the 3.5/5.25-inch bracket. See “Replacing the 3.5/5.25-inch Bracket:” on
page 11.
6. Connect the data cable to the floppy disk drive with the marked edge toward pin
1 of the drive. See “Cabling the Device” on page 32.
7. Connect the power cable to the drive. See “Cabling the Device” on page 32.
8. Replace the front panel. See “Replacing the Front Panel:” on page 8.
9. Replace the right side door. See “Replacing the Right Side Door:” on page 6.
Note: Modify the BIOS Setup program to set up drive A as
a 3.5-inch, 1.44M. For additional information refer to the BIOS
Setup chapter.
Adding a Floppy Disk Drive
If your motherboard supports 2 floppy disk drives, you can add an additional floppy
disk drive in the second 3.5-inch slot of the 3.5/5.25-inch bracket.
To add a floppy disk drive in the lower 3.5-inch slot of the 3.5/5.25-inch bracket:
1. Remove the right side door. See “Removing the Right Side Door:” on page 6.


