


A-61140 January 2000 5-19
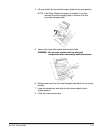
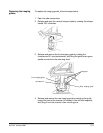
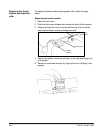
7. Swing the vertical transport plate closed and rotate the release
handle 180° counterclockwise (so the red arrow aligns with the red
rectangle) to latch the plate.
Red arrow
Red rectangle
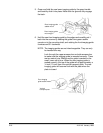
8. Close the side access door.
9. Release and lower the horizontal transport plate back into its original
position.
10. Lower the release bar and latch the front scan module into its
original position.
11. Close the lower access door.
12. Close the upper access door.
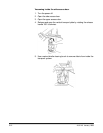
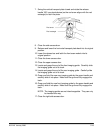
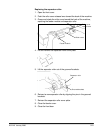
13. Locate and grasp the end of the front imaging guide. Carefully slide
the imaging guide out of its track.
14. Locate and grasp the end of the rear imaging guide. Carefully slide
the imaging guide out of its track.
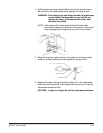
15. Grasp and hold the new rear imaging guide by the green handle and
carefully slide it into place. Make sure the grooves fully engage the
track.
16. Grasp and hold the new front imaging guide by the green handle and
carefully slide it into place. Make sure the grooves fully engage the
track.
NOTE: The imaging guides are not interchangeable. They can only
be inserted one way.
17. Close the right-side access door.