


Installing Matrox Meteor-II 25
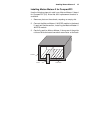
▲ Caution Some computers have a large, black-ridged heat sink that
prevents boards from using most PCI board slots. Your
Matrox Meteor-II must not touch this heat sink. Therefore,
choose a slot where the board completely avoids it.
3. Connect the Matrox Meteor-II MJPEG module to the board
if required. See the section, Installing the Matrox Meteor-II
MJPEG module.
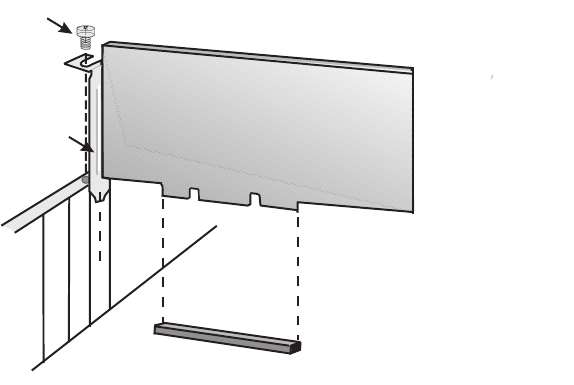
4. If present, remove the blank metal plate located at the back
of the selected slot. Keep the removed screw; you will need
it to fasten the Matrox Meteor-II board.
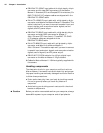
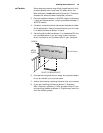
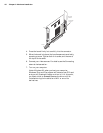
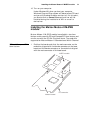
5. Carefully position Matrox Meteor-II in the selected PCI slot
as illustrated below. If you are using a tower computer,
orient the board to suit the board slots in your computer.
6. Once perfectly aligned with an empty slot, press the board
firmly but carefully into the connector.
7. Anchor the board by replacing the screw that you removed.
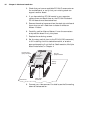
8. If you are installing the Matrox Meteor-II /Standard,
/Multi-Channel, or Meteor-II /1394, proceed to Step 9. If you
are installing the Matrox Meteor-II /Digital board, continue
with the following steps:
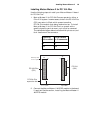
SCREW
METAL
PLATE
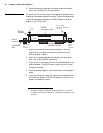
32-BIT PCI BOARD SLOT
PCI form factor
MATROX METEOR-II