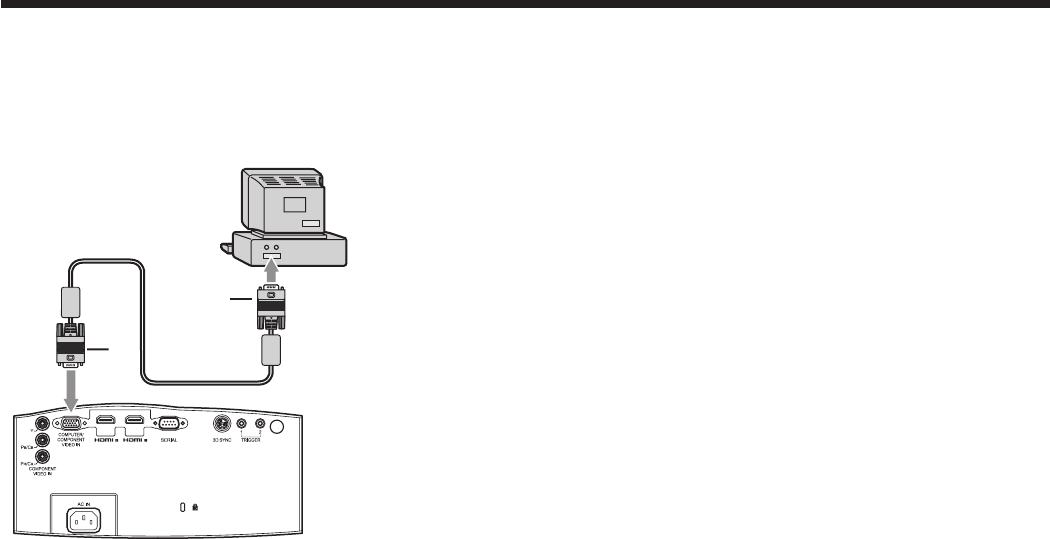
A. Connecting the projector to a computer
Preparation:
• Makesurethatthepoweroftheprojectorandthatofthecomputerareturnedoff.
• Whenconnectingtheprojectortoadesktopcomputer,disconnectthecomputercablesthatareconnectedtothe
monitor.
1. Connect one end of the supplied computer cable to the
COMPUTER/COMPONENT VIDEO IN terminal of the
projector.
2. Connect the other end of the computer cable to the
monitor port of the computer.
• Additionaldevices,suchasaconversionconnectorandan
analog RGB output adapter, are required depending on the
type of the computer to be connected.
• Turnonthepoweroftheprojectorbeforethatofthecomputer.
• Additionaldevices,suchasaconversionconnectorandananalogRGBoutputadapter,arerequireddepending
on the type of the computer to be connected.
• Useofalongcablemaydecreasethequalityofprojectedimages.
• Alsoreadtheinstructionmanualoftheequipmenttobeconnected.
• Imagesmaynotbeprojectedcorrectly,dependingonthetypeofthecomputerconnected.
• Contactyourdealerfordetailsofconnection.
About DDC
The COMPUTER/COMPONENT VIDEO IN terminal of this projector complies with the DDC1/2B standard and the
HDMI 1 and HDMI 2 terminals comply with the DDC2B standard. When a computer supporting this standard is
connected to this terminal, the computer will automatically load the information from this projector and prepare for
output of appropriate images.
• Afterconnectingacomputersupportingthisstandardtothisterminal,plugthepowercordoftheprojectorinthe
wall outlet first, and then boot up the computer.
B. Plugging the power cord
Plug the power cord in the same way as described in “Viewing video images.” (See page 17.)
To monitor port
To COMPUTER/
COMPONENT VIDEO IN
terminal
Computer cable
Viewing computer images
