


REV 2.4
19
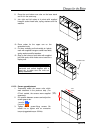
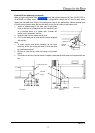
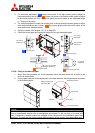
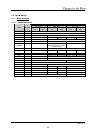
11. Press down the slide lock levers in both sides to unlock, and
draw the screen-holding arms till locked.
6
6
7
7
”
”: The levers can be unlocked respectively.
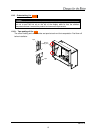
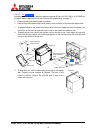
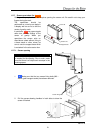
12. Reinstall the screen unit in its original
cabinet. Put the pins inside the screen
unit on the retainers at the top of the
screen-holding arms, following which
make the screen upright. Make sure it
will be locked securely.
6
6
7
7
”
”: Screen attaching/detaching work
should be done by two or more
people.
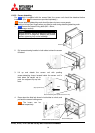
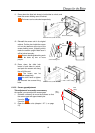
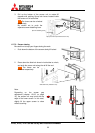
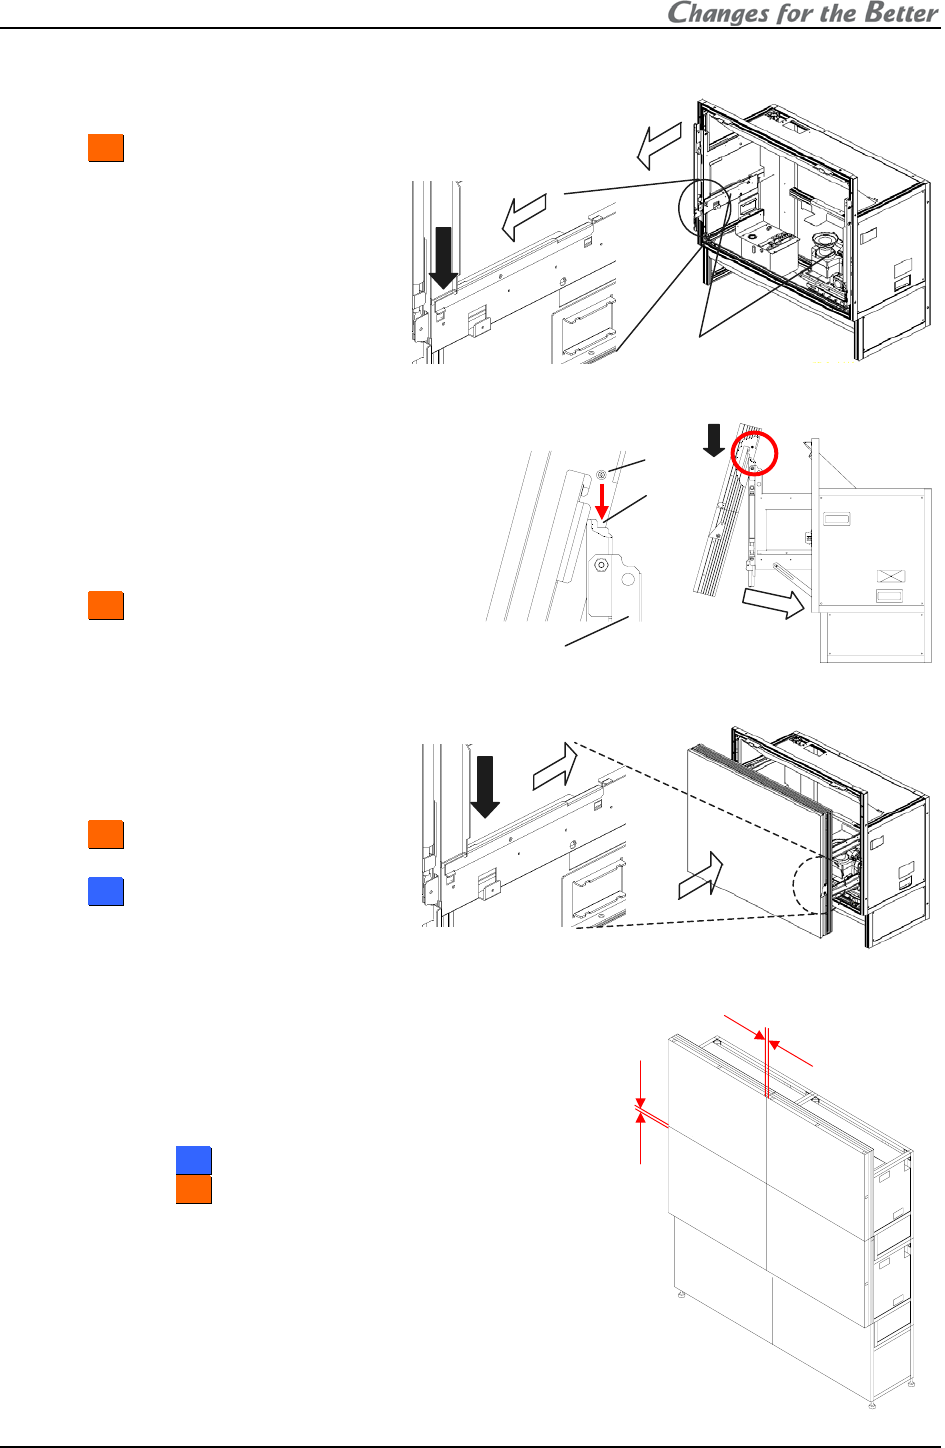
13. Press down the slide lock
levers in both sides to unlock,
and push the screen unit along
the rail till the end.
6
6
7
7
”
”: The levers can be
unlocked respectively.
5
5
0
0
”
”: You don’t have to tighten
the removed two screen-fixing
bolts.
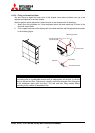
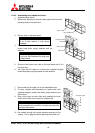
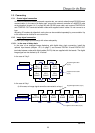
1.2.6.5. Screen gap adjustment
This adjustment is normally unnecessary.
As needed, you can adjust the screen gaps.
1. Estimate a distance to move the screens so that
the screen gaps will approximately be:
2 mm for
5
5
0
0
”
” or
3 mm for
6
6
7
7
”
”.
2. Open the screen units (chapter 1.2.7.1, on page
21).
Screen-holding arm
Slide lock lever (Inside the arm)
Slide lock lever (Inside the arm)
2mm
(3mm)
2mm
(3mm)
screen-holding arm
Pin
Retainer