


PH50, XL50, XL21 series Set-up and Installation Manual
28
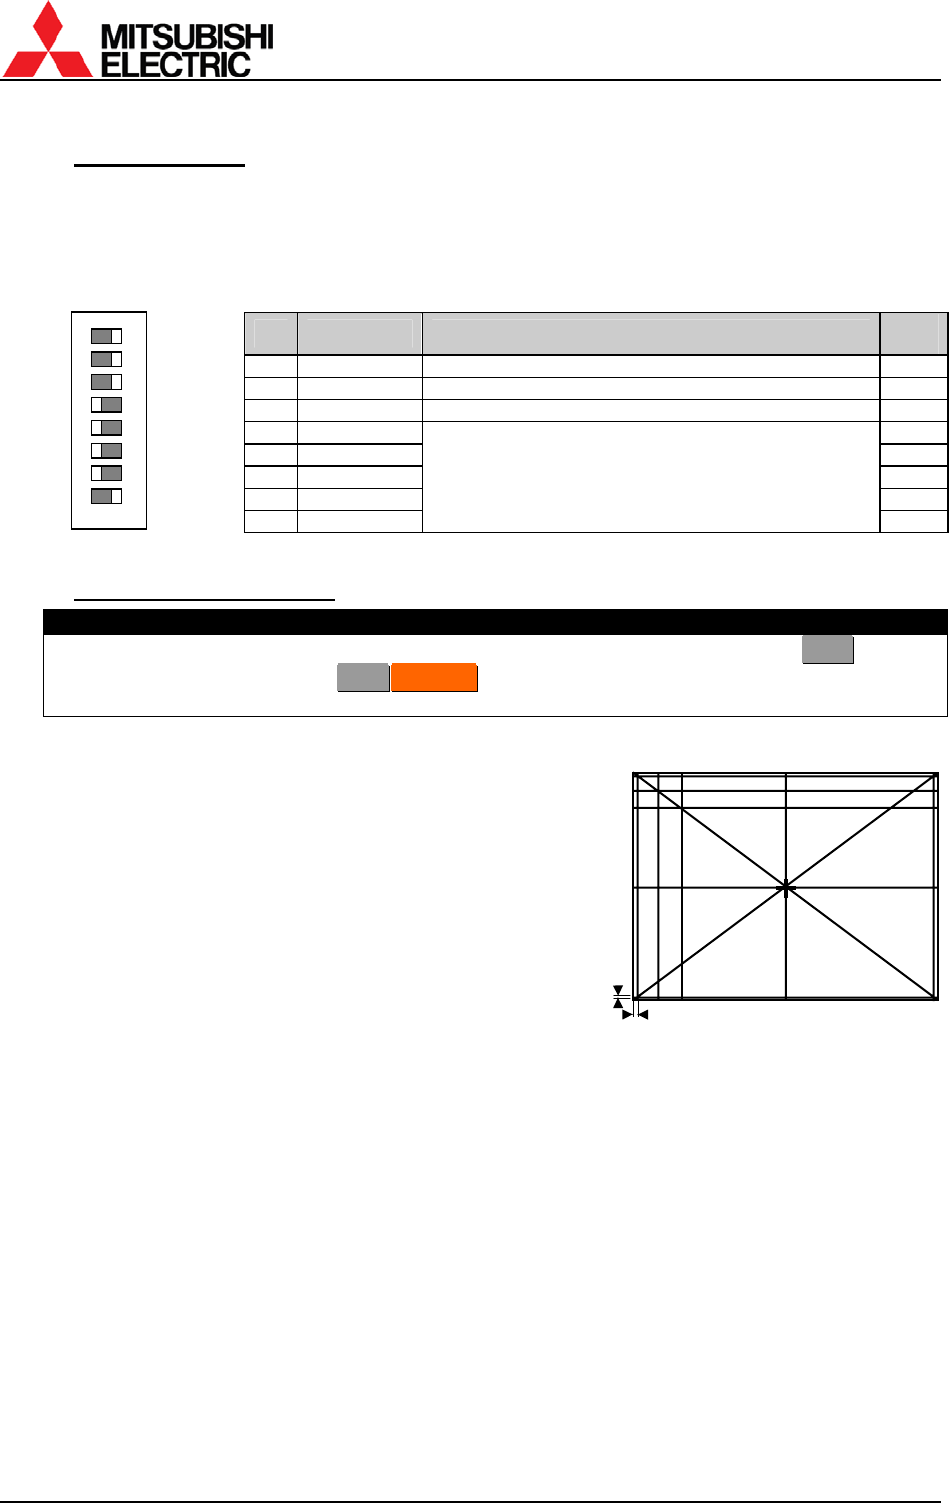
1.4.2. Dipswitch setting
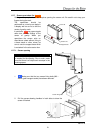
Before turning on the main power switch, set the dipswitch correctly according to a system
configuration (see “
1.3 Connecting” on page 23). The set ID can be set up to 64 (see “1.5.1.14
EXTENDED ID” on page 41). Be sure to turn off the main power switch if you change the setting
in the middle of the operation. Turning on the main power switch will renew the setting.
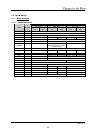
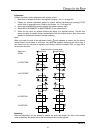
No. Name Function
Initial
setup
1 RC Enabling remote control (ON: enabled, OFF: disabled) ON
2 RESERVED Normally ON. ON
3 MASTER MASTER/SLAVE setting (ON: MASTER, OFF: SLAVE) ON
4 ID5 OFF
5 ID4 OFF
6 ID3 OFF
7 ID2 OFF
8 ID1
Designating set ID number (1 to 32) (ON: 1, OFF: 0)
ID No.=1×(ID1)+2×(ID2)+4×(ID3)+8×(ID4)+16×(ID5)
Example:
ID No.=1: ID1=ON, ID2, ID3, ID4 and ID5=OFF
ID No.=32 :ID1, 2, 3, 4 and 5=OFF
ON
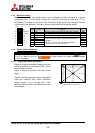
1.4.3. Picture outline adjustment
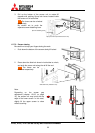
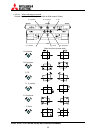
1.4.3.1. Displaying internal test pattern
Display the internal crosshatch pattern for picture
outline adjustment by pressing [TEST] button
twice in advanced mode.
Adjust to align the outermost lines with screen
edges.
There are another adjustment lines for over-scan
inside the outermost lines. When OVERLAP
setting (chapter
1.5.1.6, on page 38) is ON,
adjust the picture outline so that these lines fit the
screen edges.
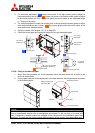
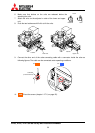
Caution
Before turning on, make sure again that the color wheel has been unlocked for
X
X
L
L
2
2
1
1 (chapter
1.2.4.1, on page 8) and, for
X
X
L
L
2
2
1
1
C
C
h
h
a
a
n
n
g
g
e
e
r
r, the lamp cushion has been removed (chapter
1.2.4.2, on page 9).
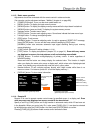
RESERVED
MASTER
ID5
ID4
ID3
RC
ID2
ID1
OFF ON
1
2
3
4
5
6
7
8
A
djustment lines for ove
r
-scan