


REV 2.4
51
INPUT PORT
A
NALOG
DIGITAL
1.6. Input memory setting (for the main input)
Press [MENU1] button to display the input memory menus. You can exit the menu by [ESC] button.
Be careful that menus for the main input are different from the ones for the input board.
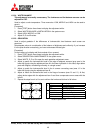
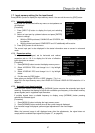
1.6.1. Input port selecting
Input ports can be switched while any menus or test patterns are
not displayed.
[Procedure]
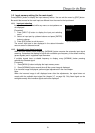
1. Press [INPUT A] button to display the input port selecting
menu.
2. Select an input port by up/down buttons and press [ENTER]
button to change.
3. Press [ESC] button to exit the menu.
The current input port is also displayed in the status information
area on screen in advanced mode.
1.6.2. Automatic input signal scanning
While an input memory menu displaying, [NORMAL] button executes the automatic input signal
scanning. It searches and displays a signal with a suitable sync frequency in the default memory
(preset signals) and in registered input memories.
If multiple signals have a suitable frequency to display, every [NORMAL] button pressing
switches the selected signal.
[Procedure]
1. Press [MENU1] button to display the input memory menu.
2. Press [NORMAL] button several times till the correct image is displayed.
If an incorrect image is displayed, perform signal adjustments in the next chapter.
Note:
When the incorrect image is still displayed even after the adjustments, the signal does not
comply with the available input signal list (chapter
3.7, on page 94). Only listed signal can be
enlarged correctly. Also interlace signals cannot be displayed.
Input port selecting menu