


2-7
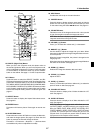
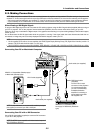
POWER
ENTER
MENU
SOURCE
FOCUS
PC CARD
CANCEL
STATUS
LAMP
ON/
STAND BY
AUTO
ADJUST
3D
REFORM
SELECT
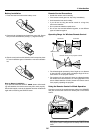
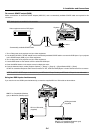
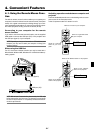
PC CARD
AUDIO IN
R
L
/MONO
VIDEO IN
S-VIDEO IN
DVI-I IN
RGB IN RGB OUT
DVI-I RGB
AUDIO IN
USB
AUDIO OUT
PCCONTROL
REMOTE
IN
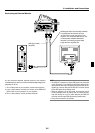
PC CARD
AUDIO IN
R
L
/MONO
VIDEO IN
S-VIDEO IN DVI-I IN
RGB IN RGB OUT
DVI-I RGB
AUDIO INUSB AUDIO OUT
PCCONTROL
REMOTE
IN
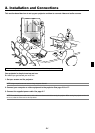
AUDIO IN
VIDEO IN
S-VIDEO IN
AUDIO IN
LR
AUDIO OUT
L R
VIDEO OUT
S-VIDEOVIDEO
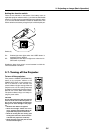
VCR/ Laser disc player
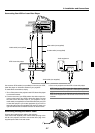
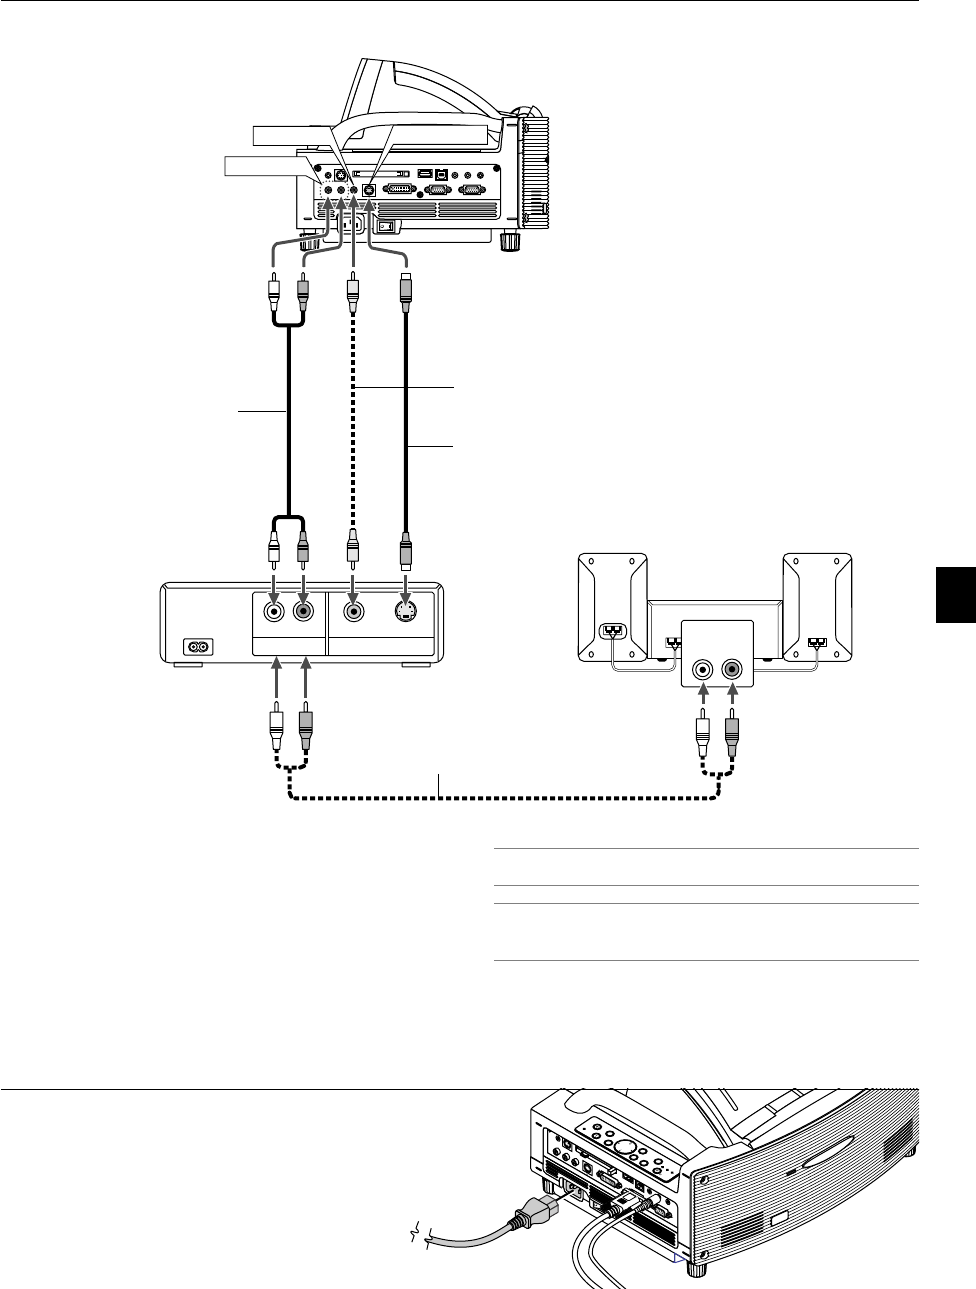
Connecting Your VCR or Laser Disc Player
Audio equipment
S-video cable (not supplied)
Video cable (not supplied)
Audio cable (not supplied)
Use common RCA cables (not provided) to connect your VCR,
laser disc player or document camera to your projector.
To make these connections, simply:
1. Turn off the power to the projector and VCR, laser disc player
or document camera.
2. Connect one end of your RCA cable to the video output con-
nector on the back of your VCR or laser disc player, connect
the other end to the Video input on your projector. Use an
audio cable (not supplied) to connect the audio from your VCR
or laser disc player to your audio equipment (if your VCR or
laser disc player has this capability). Be careful to keep your
right and left channel connections correct for stereo sound.
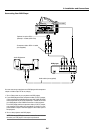
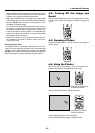
Connecting the Supplied Power Cable
Connect the supplied power cable to the projector.
First connect the supplied power cable's three-pin plug to the
AC IN of the projector, and then connect the other plug of the
supplied power cable in the wall outlet.
Audio cable (not supplied)
3. Turn on the projector and the VCR or laser disc player.
NOTE: Refer to your VCR or laser disc player owner's manual for
more information about your equipment's video output requirements.
NOTE: An image may not be displayed correctly when a Video or S-
Video source is played back in fast-forward or fast-rewind via a scan
converter.
2. Installation and Connections