OkiLAN 6200e Plus User’s Guide
EtherTalk Support for Apple Macintosh 187
Running the Network Print Server Utility
1. Turn on your printer and check that it is on-line.
2. Verify that the Network Print Server status LED is
solid green.
3. Copy the CD-ROM folder labeled OkiNet Utilities
for EtherTalk to a utilities folder on the Macintosh
hard drive.
4. Run the Network Print Server utility by double-
clicking the OkiLAN 6200e Plus utility icon.
Finding the Network Print Server
The Zone Selection window contains a list of zones
available on the network. If no router is found, an
asterisk “*” displays. To locate Network Print Servers
on the network:
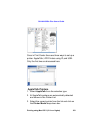
1. Select a zone to search for Network Print Server
printers. Shift-click to select multiple zones or click
Select All to select all available zones.
2. Select Search to search the network for printers in
the selected zones or select Quit to exit the utility.
Renaming the Network Print Server Printer
The Printer Selection window contains a list of all print-
ers found in the selected zones. Printers are listed
alphabetically by name. Each port of a multiport Net-
work Print Server will appear separately in the list.
Unless otherwise stated, changing a configuration
option will affect only the selected port.
1. Choose the printer you wish to rename.
2. Select Name from the Configure pull-down menu.


