13
1. Installation
1-2. Installing the mainframe
Comply with the instructions set forth in “Safety precautions” and also observe
the cautionary items below.
Be absolutely sure to ask your dealer to do the jobs of installing and connecting the mainframe.
Connecting the power supply
Be absolutely sure to use the power cord supplied with the mainframe.
Be absolutely sure to connect the grounding terminal of the power cord to ground.
Handle the mainframe carefully!
Dropping the mainframe or subjecting it to strong impact or vibration may cause trouble and/or malfunctioning.
Do not allow any foreign objects to enter inside the mainframe!
Allowing water, metal items, scraps of food or other foreign objects inside the control panel may cause a fire
and/or electric shocks.
Choosing the best installation location
This unit is designed for indoor use only.
Mount the mainframe securely in a standard 19-inch rack (with a depth dimension of at least 600 mm) that
meets the EIA standard or its equivalent for use.
Install the mainframe securely using screws that are compatible with the rack.
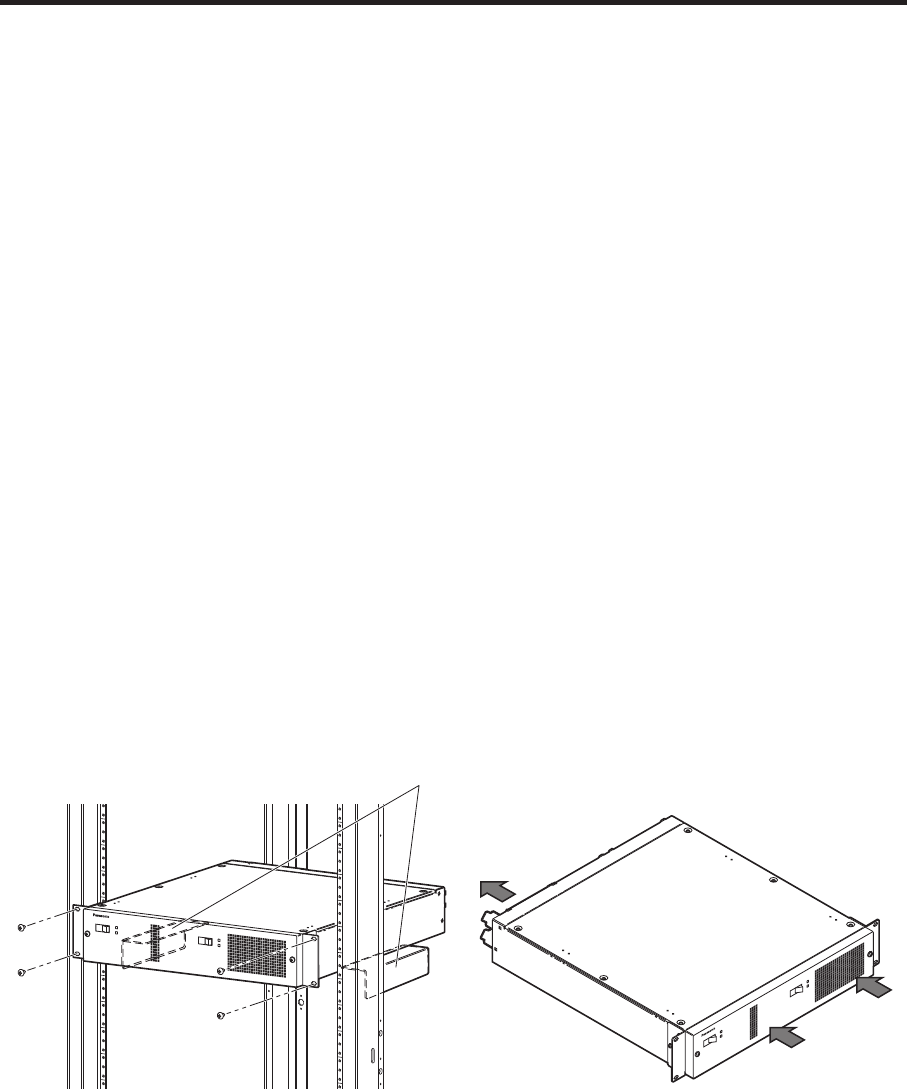
Be absolutely sure to attach the support guides used to support the back part of the mainframe. (Provide
support guides that are compatible with the rack.)
Provide sufficient clearances from the area around the ventilation holes at the front and the cooling fan at the
back.
Do not install the mainframe in a cold place where the temperatures will drop below 32 °F (0 °C) or in a hot
place where the temperatures will rise above 104 °F (40 °C).
Avoid installing the mainframe where it will be exposed to direct sunlight or to the hot air that is blown out from
other products.
Installing the mainframe in a very humid, dusty or vibration-prone location may give rise to trouble.
Support guides
Installation in a rack
POWER1
POWER1
ALARM1
OFF
POWER2
ON
OFF
ON
POWER2
ALARM2
Multi-format Live Switcher AV-HS450
Flow of air through the ventilation holes
OFF
POWE
R2
ON
POWER2
ALARM2
Multi-format Live Switcher AV-HS450
POWER1
OFF
ON
POWER1
ALARM1


