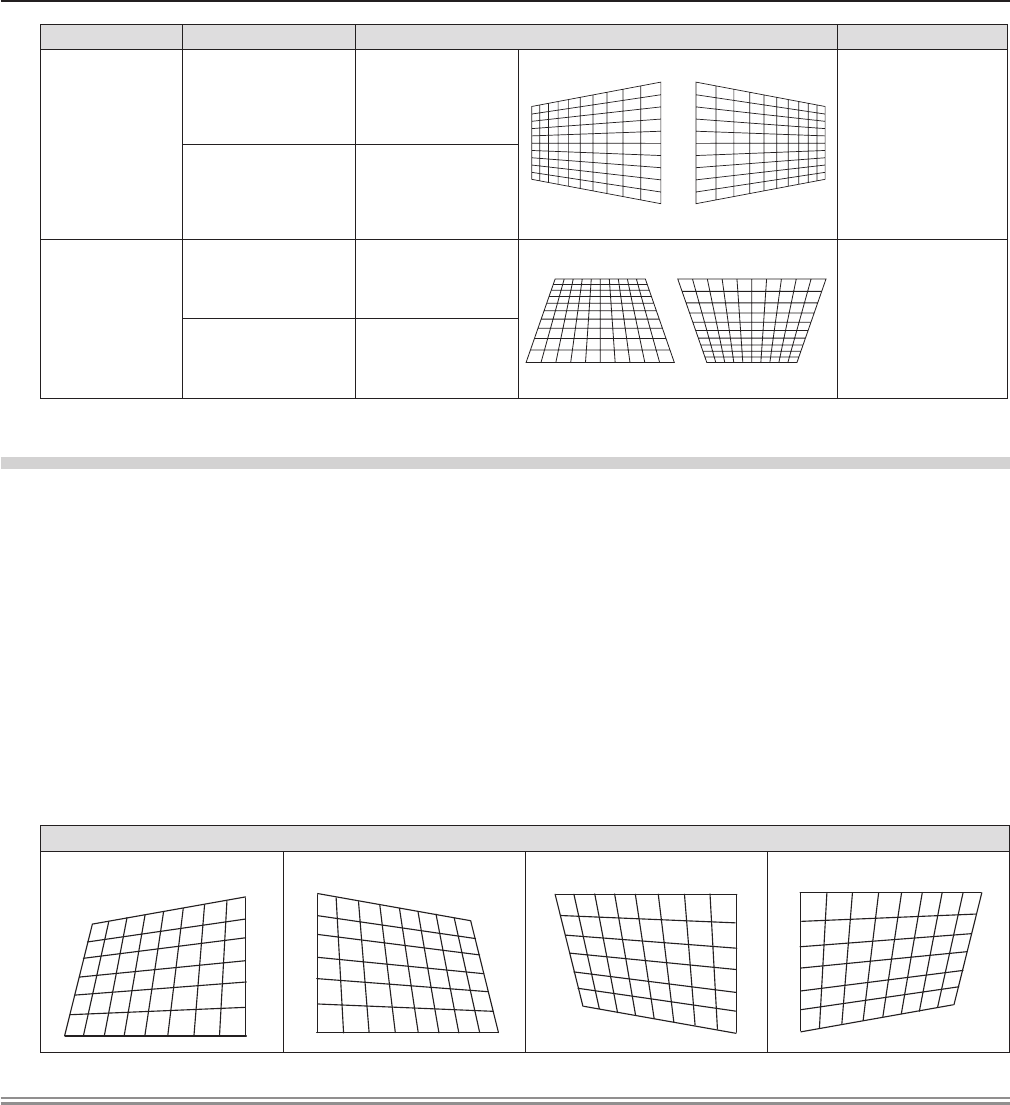
Items Operation Adjustment Adjustment range
[HORIZONTAL]
Press the w button.
Adjusts the right of
the keystone.
-60 ~ +60
Press the q button.
Adjusts the left of the
keystone.
[VERTICAL]
Press the a button.
Adjusts the upper of
the keystone.
-80 ~ +80
Press the s button.
Adjusts the bottom of
the keystone.
[CORNER CORRECTION]
Press 1) as to select [KEYSTONE].
Press the <ENTER> button.2)
The [KEYSTONE] screen is displayed. f
Press 3) as to select [CORNER CORRECTION].
Press the <ENTER> button.4)
The [CORNER CORRECTION] screen is displayed. f
Press 5) as to select the item to adjust, then press the <ENTER> button.
The [CORNER CORRECTION] individual adjustment screen is displayed. f
Press 6) asqw to adjust.
[CORNER CORRECTION]
[UPPER LEFT] [UPPER RIGHT] [LOWER LEFT] [LOWER RIGHT]
Note
Either [KEYSTONE] or [CORNER CORRECTION] setting value is valid. When [KEYSTONE] or [CORNER CORRECTION] f
adjustment is nished, you adjust the other one, the adjusted value will be reset.
Press the <KEYSTONE> button on the remote control when the [KEYSTONE] or [CORNER CORRECTION] screen is f
displaying, it will switch to the other adjustment screen.
When the [CORNER CORRECTION] individual adjustment screen is displaying, the individual adjustment screen of the next f
corner can also be displayed by pressing the <ENTER> button.
Correcting up to ±40° for the tilt in the vertical direction and ±30° for the tilt in the horizontal are available for adjustments f
with [KEYSTONE]. However, the image quality will degrade and it will get harder to focus with more correction. Install the
projector so that the correction will be as small as possible.
Screen size will also change when [KEYSTONE] is used to perform various adjustments. f
Aspect ratio of the image size may shift depending on the correction. f
ENGLISH - 55
Chapter 4 Settings - [POSITION] menu
