70 –
ENGLISH
Display Option settings (continued)
Press ENTER.
10.
The “TARGET DATA” screen will be displayed.•
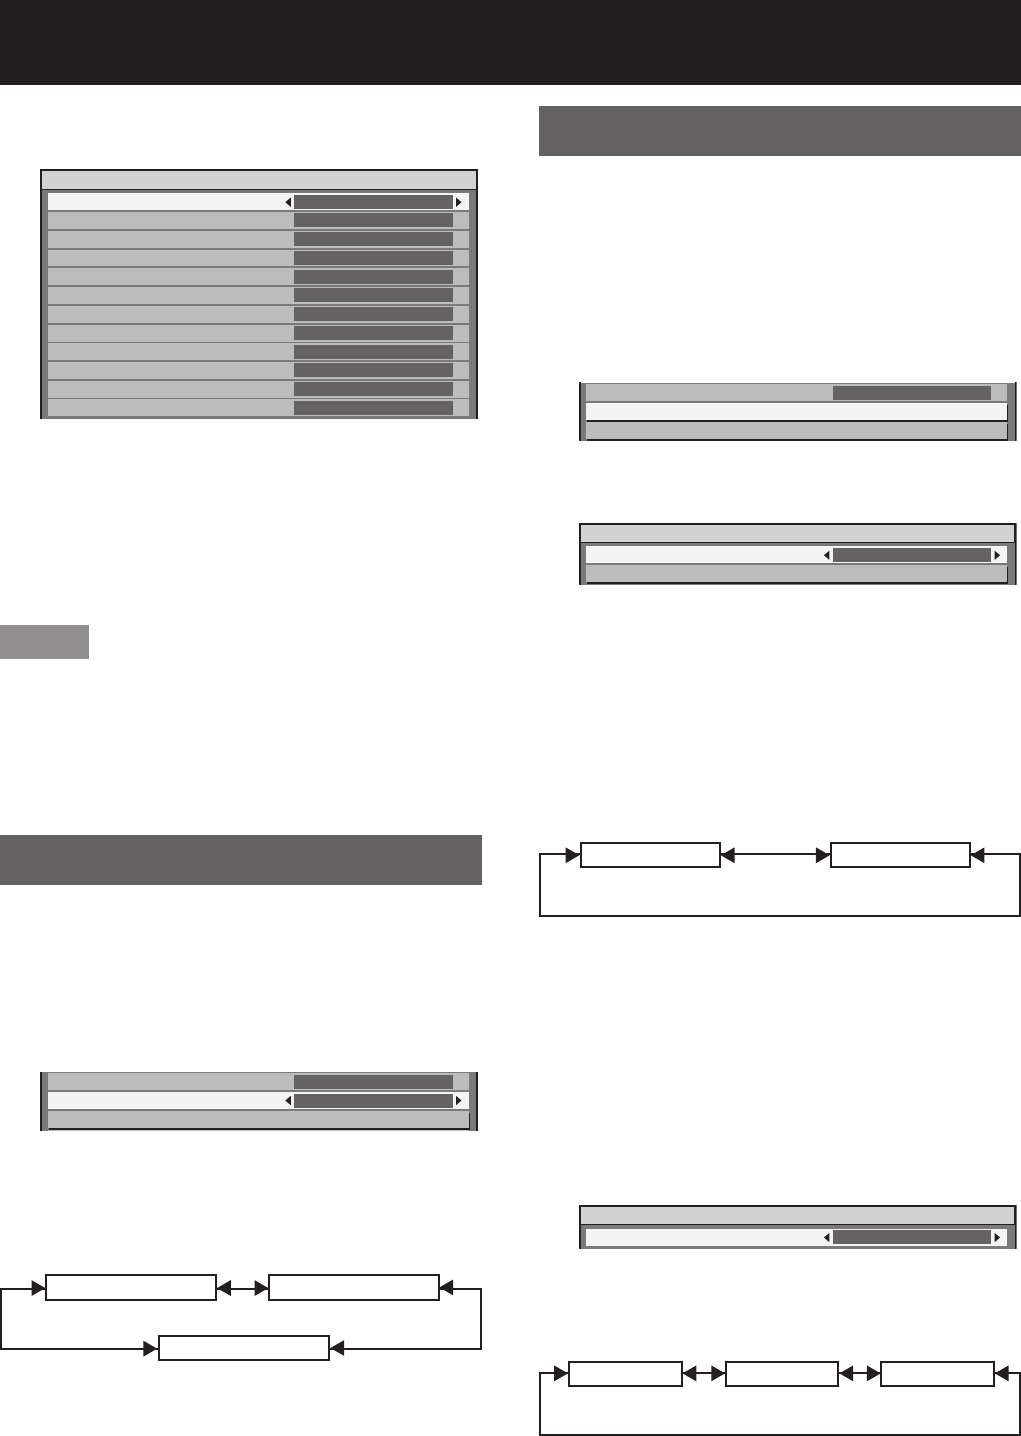
TARGET DATA
RED x
y
GREEN x
y
BLUE x
y
CYAN x
y
MAGENTA x
y
YELLOW x
y
0.64
0.33
0.3
0.6
0.15
0.6
0.225
0.329
0.321
0.154
0.419
0.505
1/2
Press ▲▼ to select the desired
11.
colours, and press ◄► to input
their coordinates.
After all the data has been input,
12.
press MENU.
Note
If “709MODE” has been selected as the “COLOR •
MATCHING” setting, the 3 primary colours defined
by the ITU-R BT.709 standard will be set as the
target data.
If the target data is outside the colour range of the •
projector, the colours will not be projected correctly.
Large Screen Correction
If watching images close up on a large screen, you
can correct the colours that appear lighter on the
screen so that they appear the same as the colours
that would appear on a normal-sized screen.
Press ▲▼ to select “LARGE 1.
SCREEN CORRECTION”.
COLOR MATCHING
LARGE SCREEN CORRECTION
RGB IN
OFF
OFF
Press ◄► to switch “LARGE 2.
SCREEN CORRECTION”.
The setting will change as follows each time •
◄► is pressed.
1 (Low)OFF (No correction)
2 (High)
RGB IN (Only RGB input)
When unregistered signals are to be input frequently
because the unit is used at conferences or other
venues, the screen display position can be adjusted
automatically without having to press AUTO SETUP
on the remote control each time.
Use this setting when adjusting a specific or oblong
(16:9, etc.) signal.
Press ▲▼ to select “RGB IN”.1.
LARGE SCREEN CORRECTION
RGB IN
DVI-D IN
OFF
Press ENTER.2.
The “RGB IN” screen will be displayed.•
RGB IN
AUTO SIGNAL
AUTO SETUP
OFF
AUTO SIGNAL
Press ▲▼ to select “AUTO 3.
SIGNAL”.
Press ◄► to switch “AUTO 4.
SIGNAL”.
The setting will change as follows each time •
◄► is pressed.
OFF ON
If unregistered signals are input when “ON” •
is selected, auto setup will be initiated
automatically.
AUTO SETUP
Press ▲▼ to select “AUTO 5.
SETUP”.
Press ENTER.6.
The “AUTO SETUP” screen will be displayed.•
AUTO SETUP
MODE
DEFAULT
Press ◄► to switch “MODE”.7.
The setting will change as follows each time •
◄► is pressed.
DEFAULT WIDE USER


