


4 – Installation
Installing a Switch
59021-05 A 4-15
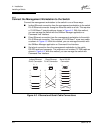
4.2.12
Configure the Switch
Do the following to configure a switch using the SANbox Manager application.
Refer to the SANbox2-8c/16 Switch Management User’s Guide for more
information about configuring a switch. You can also configure the switch using
the Command Line Interface. Refer to Appendix B Command Line Interface for
more information.
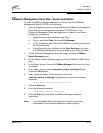
1. Connect to the switch using an Ethernet connection and run SANbox
Manager.
2. Open the Fabric menu and select Add Fabric to open the Add a New Fabric
window.
3. Enter a fabric name and the IP address of the switch through which to
manage the fabric. The default IP address is 10.0.0.1. If this is a new switch,
leave the login name and password fields empty, and choose the Add
Fabric button. By default, fabric security is disabled, and therefore account
names and passwords are not enforced. Refer to the ”Set Setup Command”
on page B-38 for information about setting fabric security.
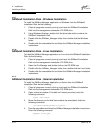
4. Open the Switch menu and select Switch Properties. In the Switch
Properties window, enter a chassis name. Accept the default domain ID, and
choose the OK button.
5. Open the Switch menu and select Network Properties. In the Network
Properties window, enter values for the IP address, subnet mask, and
gateway address. Accept the default boot method. If you know the SNMP
configuration settings, enter those as well. Choose the OK button.
6. Set the date and time. Double click on the switch in the topology display. In
the faceplate display, open the Switch menu and select Set Date/Time.
Enter the date and time in the Switch Date and Time window and choose the
OK button. Reset the switch when prompted to implement the new and date
and time.
Repeat this process for each switch in the fabric, then connect the switches.