


CHAPTER 2: INSTALLATION 5
1 3
4
5
6
7
8
2
O
p
tiona
l
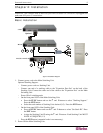
Chapter 2: Installation
Important: The Paragon and all devices you want to attach to it must be unplugged and
powered OFF prior to installation.
Basic Installation
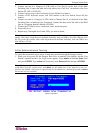
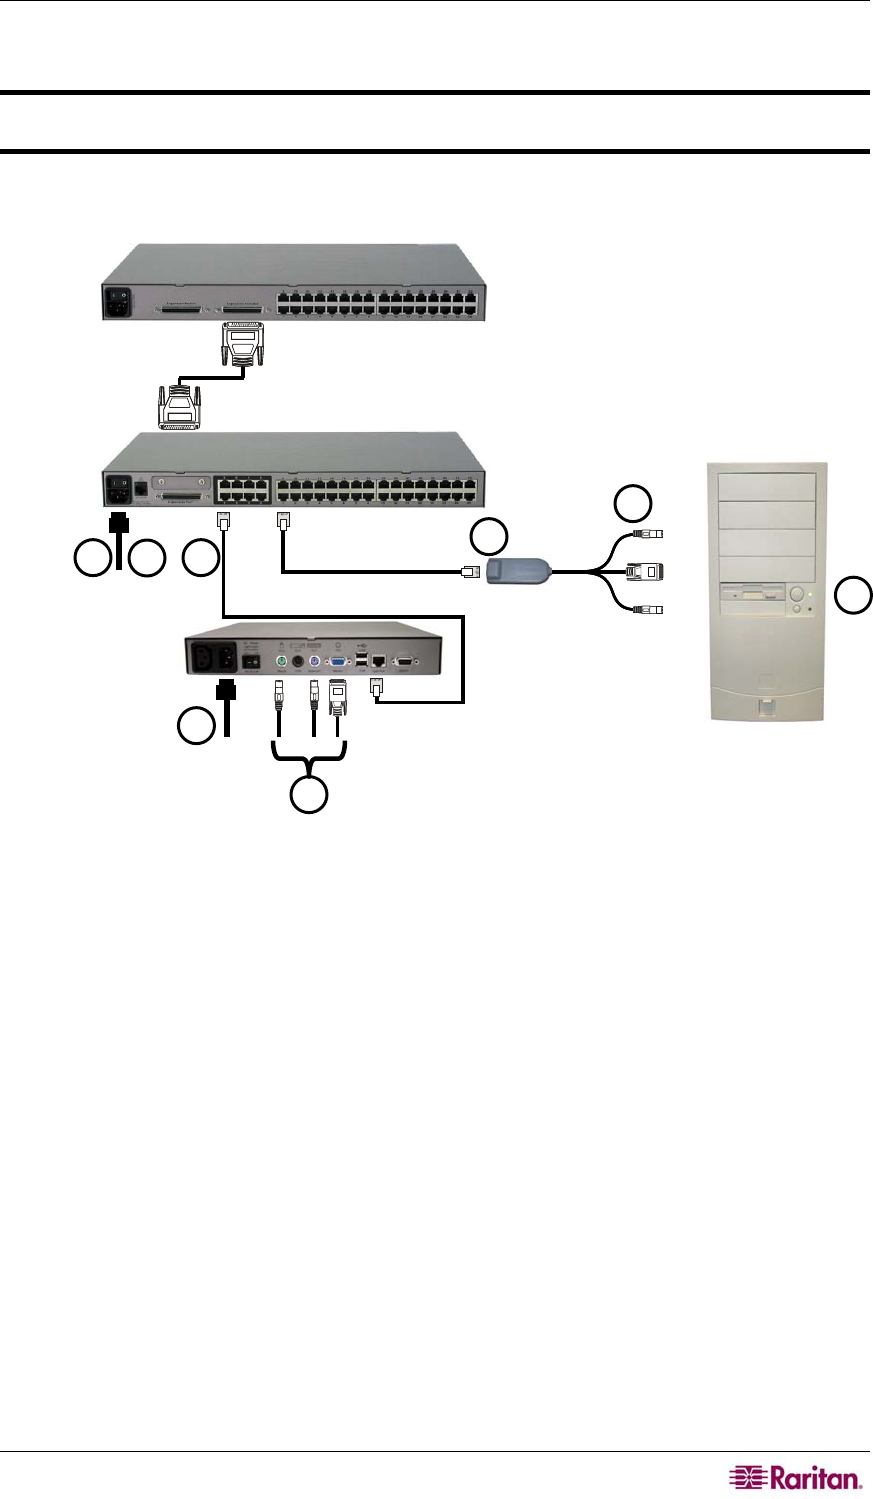
Figure 4 Installation Diagram
1. Connect power cord to the Main Switching Unit.
Optional Stacking Support:
− Connect power cord to a Stacking Unit.
− Connect one end of a stacking cable to the "Expansion Port Out" on the back of the
Stacking Unit. Connect the other end of the cable to the "Expansion Port" on the Main
Switching Unit
− Power ON all switching units
− On the front panel LCD of the Main Switching Unit:
Press the FUNC button and use the Ç and È buttons to select "Stacking Support."
Press the ENT button.
Select the total number of Stacking Units desired (0-3). Press the ENT button.
− On the front panel LCD of the Stacking Unit:
Press the FUNC button and use the Ç and È buttons to select "Set Stack ID." Press
the ENT button.
Assign the Stacking Unit ID using the Ç and È buttons. Each Stacking Unit MUST
HAVE A UNIQUE ID (1-3)
− Press the ENT button (sequential order is not necessary).
2. Power ON the Main Switching Unit.
P2-UST or P2-EUST
M Unit
S Unit