


CHAPTER 4: OPERATION – ADMINISTRATOR FUNCTIONS 45
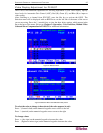
Channel Configuration
To edit or initialize a P2CIM, change the device name, individual scan rate, device type, and
group IDs associated with each server or device, select option 3, Channel Configuration, from
the Administration Menu. When you save Channel Configuration changes, Paragon II will update
each affected P2CIM-PS2 as necessary.
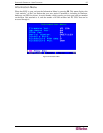
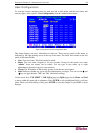
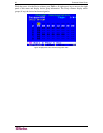
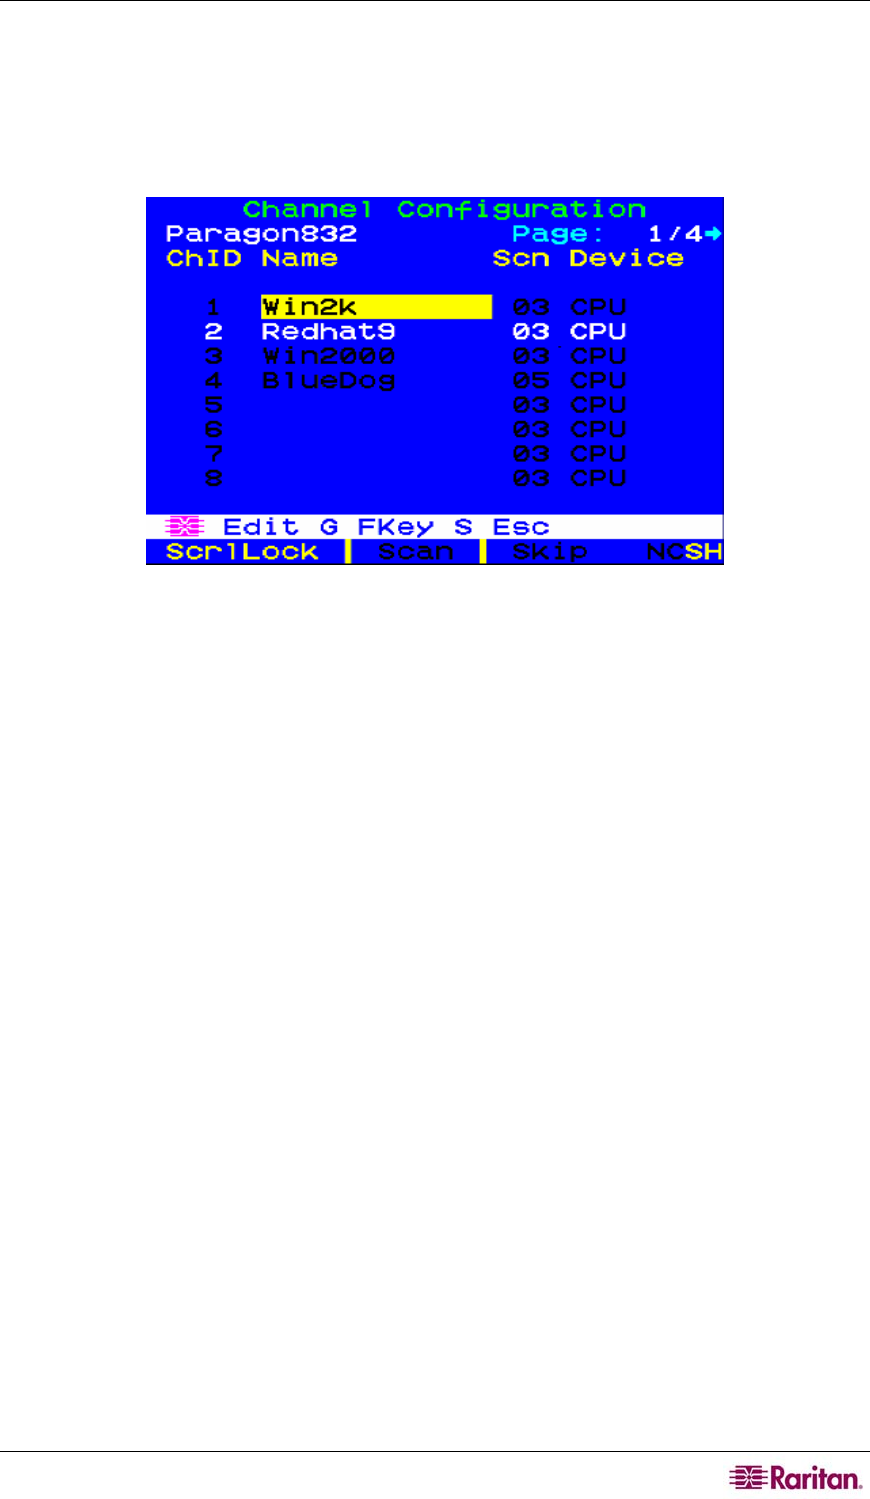
Figure 45 Left panel of the Channel Configuration Menu
This menu displays one channel port’s information in each row. If the Paragon system detects a
powered device on that channel port, it will display the text in that row in green; otherwise, it will
display it in black. Again, there are two panels in this menu, indicated by the right-pointing arrow
at the top of the menu. The fields and columns on the left panel of this menu:
• ChID: The channel port’s channel port-ID number.
• Name: The name of the device attached to that channel port. Device names are case-sensitive
and may be up to twelve alphanumeric characters long. As shown with channel port #1 in and
elsewhere, you may leave a device name blank if you wish, but Raritan does not recommend
this.
• Scn: Displays the device’s individual scan rate (the length of time that the system pauses
while scanning that channel port for any user with Scan Mode set to “Individual” rather than
“Global”). Using leading zeroes if necessary, type in a two-digit number of seconds from 01
to 24, or use the Ç and È keys to increment and decrement the current value by 1
respectively. The default setting is 03.
Use the arrow keys, TAB, SHIFT + TAB, Page Up, Page Down, Home, and End to move
within this menu and its submenus. Press ENTER to edit a highlighted field; it will turn green.
When you finish editing a field, press ENTER followed by S to save the changes, or press ESC
to abort them.