


CHAPTER 3: OPERATION – USER FUNCTIONS 29
Selecting a Server
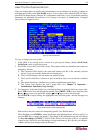
Immediately following user login, the Selection Menu appears. Users who are already switched to
a server can activate the Selection Menu by pressing the hotkey (default: Scroll Lock, Scroll
Lock) , then pressing F2.
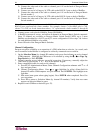
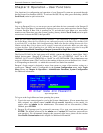
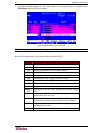
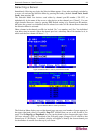
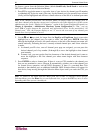
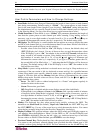
The Selection Menu lists devices sorted either by channel port-ID number (“Ch. ID”) or
alphabetically by the name of the server or other device on that channel port (“Name”). You can
toggle between these two views by pressing F12. Default sorting is by channel port-ID number,
but unless the system is re-initialized, the last selected sort order will be shown the next time that
the Selection Menu is activated.
Other columns in the channel port-ID view include “No,” row number, and “Scn,” the individual
scan-delay time in seconds (unless the channel port has a subsidiary Base Unit attached to it, in
which case the Scn column will show “- -”.)
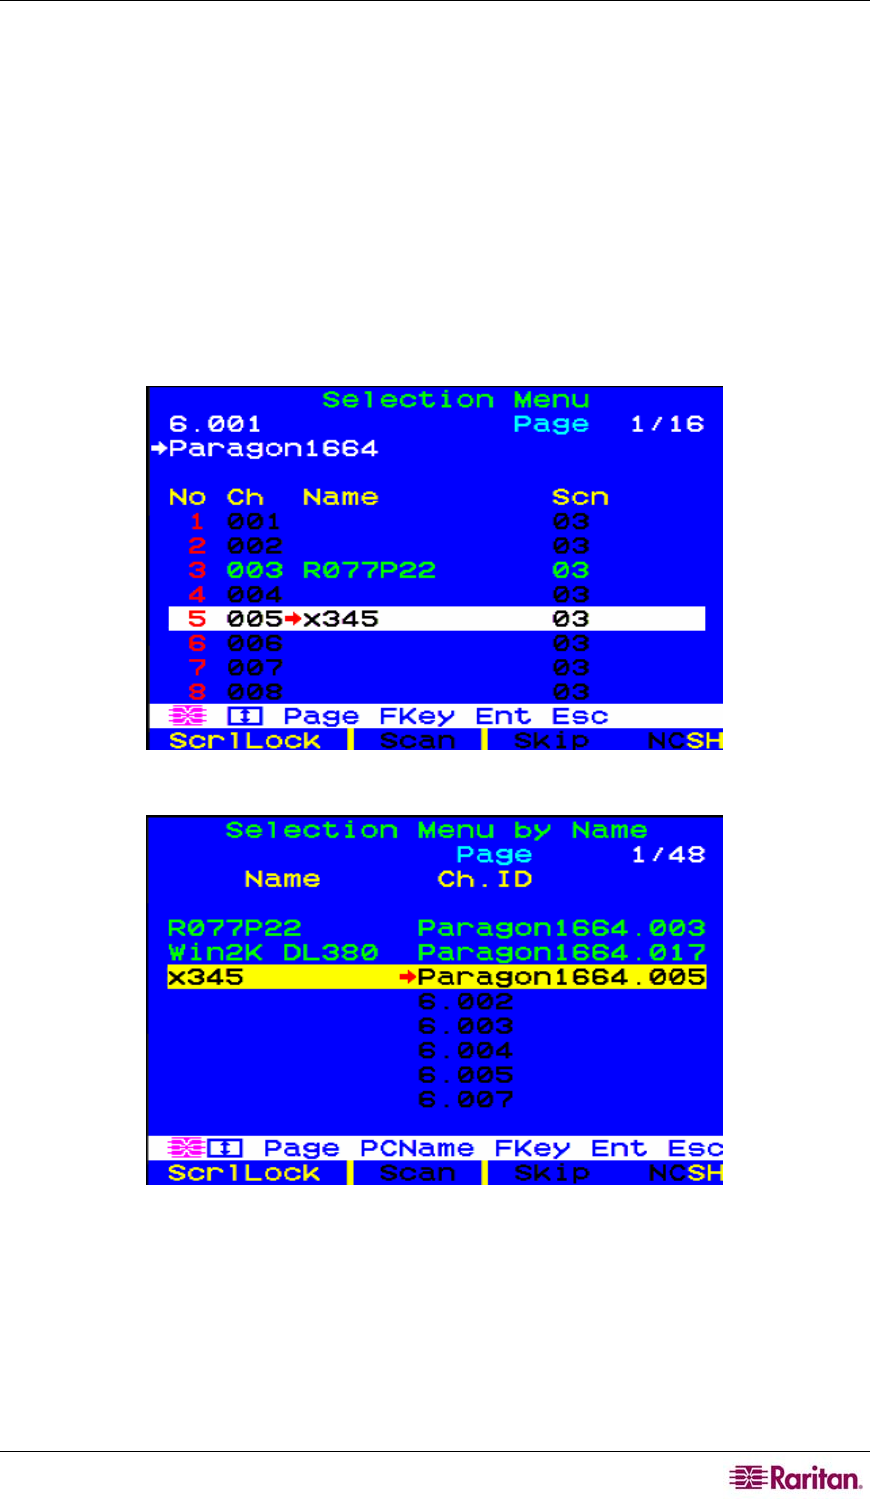
Figure 33 Selection Menu in order by Channel Port Number
Figure 34 Selection Menu in order by Port Name
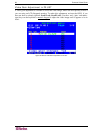
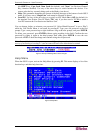
The Selection Menu displays up to eight channel ports per page; total number of pages appears in
the upper right-hand corner, for example “Page 2/5” indicates that you are on the second of five
pages. Use the PageUp and PageDown keys on your keyboard to move between the pages. Once
you have selected a CPU as described on the following pages, Paragon II will switch to that
channel port. If “ID Display” is enabled, a display will appear to identify the chosen channel port
for the number of seconds set at the top of your screen.