


ULTRAMATRIX “UMX” SERIES INSTALLATION AND OPERATIONS MANUAL
19
Next, connect the computers to the UltraMatrix switches.
11. Switch the KVM station to CPU port #1 on Unit #1 by pressing and releasing the left control [Ctrl] key, type in “1”
and press [Enter].
12. Pre-configure the CPU port #, if needed, as outlined in steps 4a-f on page 11 if the computer being connected
does not use a PC2 type keyboard or PS/2 mouse (defaults). Pre-configure the CPU port before connecting the
computer. If the computer uses a PC2 type keyboard and PS/2 mouse, connect it to the corresponding CPU port.
No pre-configuration is needed.
13. Boot the computer if power is not applied. You should see the boot up sequence on the KVM monitor. If the
computer was connected to a pre-configured CPU port with power applied, you should see that computers video.
14. Verify that the keyboard, video, and mouse on the connected computer function properly before proceeding.
15. Switch the KVM station to the next sequential CPU port as explained in step 11 and perform steps 12 – 14 for the
remaining computers.
16. Connect other KVM stations as needed to the UltraMatrix switch and verify they operate properly. (See Appendix
F. for proper KVM station placement)
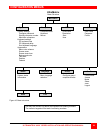
Other configuration parameters can be set-up for the system, computers, KVM stations, users, profiles, groups, and
languages. See the “Configuration menu” section for instructions on setting up these items.
Please refer to the Operations section for using the UltraMatrix switch and Appendix F for KVM placement and
usage.
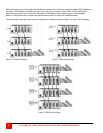
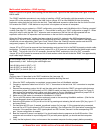
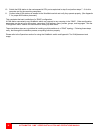
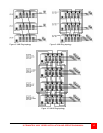
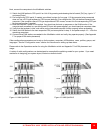
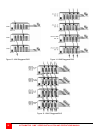
A variety of cable configurations can be designed to accomplish the switching needs for your system. If you need
assistance in designing your system layout, contact our technical staff.
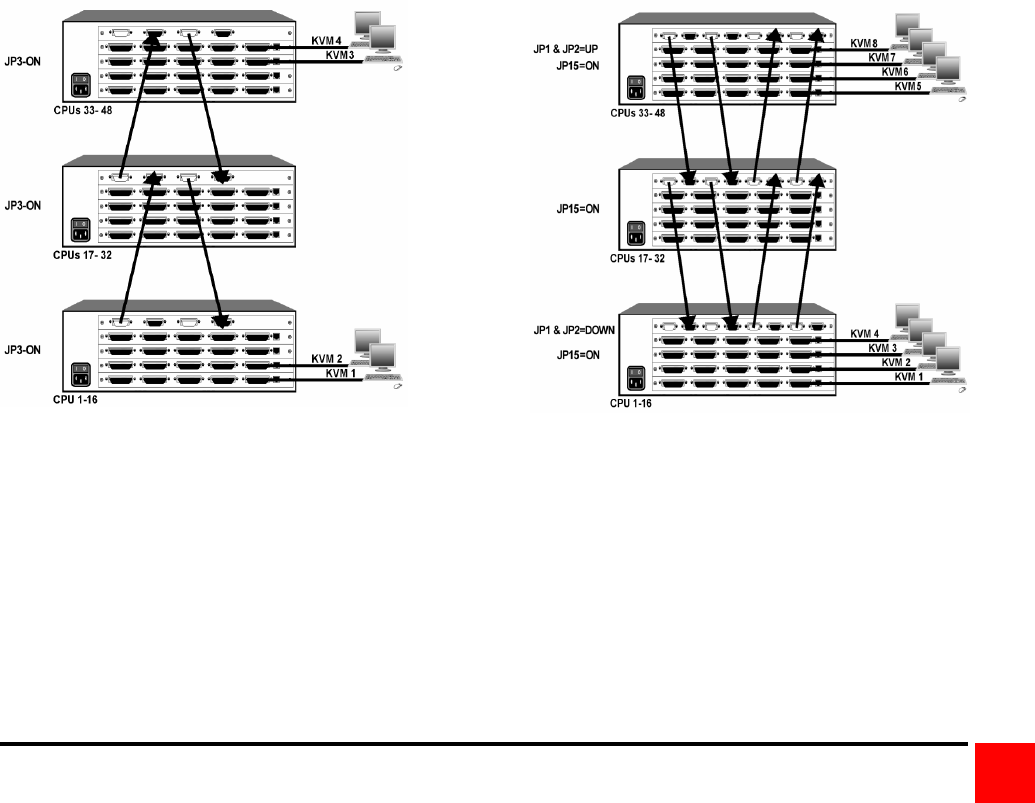
Figure 11. UM4 Split BUS Figure 12. UM8 Split BUS