


Advanced Wireless LAN Features 31
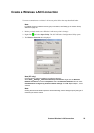
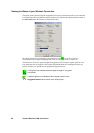
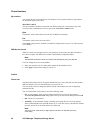
15.Click Advanced select the appropriate radio button to specify the Networks the GC79 can
access. You can select either; Computer to computer (ad hoc) networks only or Any
available network (access point preferred).
Note:
Once you create an AdHoc Wireless Network it will appear as available even if this is the only
laptop on the network.
16.Restart all the laptops that are part of the ad hoc network to allow the new IP address settings to
be approved.
17.Open GC79 Manager on all the laptops. Make sure the WLAN connection is enabled. If WLAN
icon in the system tray doesn't turn green right click and check the radio is on (menu will
display Disable radio).
Note:
Make sure that Firewall on the computers is setup to allow this type of connection or disabled.
Ask your Network Administrator if you need assistance.
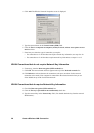
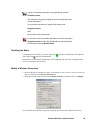
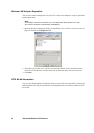
18.Right click and select Open utility. Select the Site Monitor tab, tick the Ad hoc network
only box. The Network Name (SSID) you specified should appear after a short delay. Click OK.
Connecting the PCs
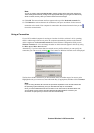
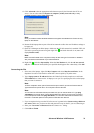
1. Select one of the laptops, right click My Computer and select Map Network Drive. In the
dropdown list select a free hardriver name that is not occupied by any other name.
2. Type \\laptop name or IP address\C$ into the Folder field. In this example we would enter
\\192.168.0.1\C$ to connect to the 1st laptop we set up.C$ is specifying the drive on the laptop
that you want to connect to.
Note:
To find a computers name; open a Command Prompt on the PC you want to find the name of.
Type hostname and press return. The computer name is returned.
Note:
You can also use a Command Prompt to make sure you can see the other PC. Type ping
<IP address> and press return (The IP address belongs to the PC you are trying to contact).
In the example we would enter ping 192.168.0.1, PC 1 sends a small amount of data to PC2,
if the PC is contacted replies for each packet of data sent are returned.
3. If you are required to log on to the PC before access is granted select Connect using a different
user name. Make sure you have an alias and password set-up on the PC you are connecting to.
4. Enter your User name and Password into the Connect As... dialog.
5. Click OK and Finish.