46 GC79 Manager Phone Book Screen
To Move an Entry:
1. Select an entry.
2. Select Move To in the Phone Book menu. The Move To option is followed by the name of the
Phone Book you haven’t selected the entry from.
3. The entry is moved from its current Phone Book and placed in the selected one. The new entry
is assigned the next available position in the destination Phone Book.
To Import an Entry or Phone Book:
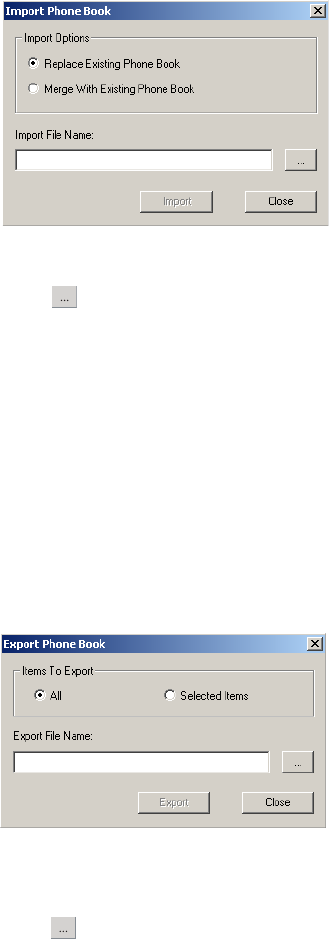
1. Select Import from the Phone Book menu.
2. Select the Replace Existing Phone Book or Merge with existing Phone Book radio button.
3. Click and browse to find the file you want to import.
Note:
The file must be a text file in comma separated value (CSV) format. Any invalid lines
or files will be ignored.
4. Click OK in the browse dialog. The path and file name are displayed in the Import File
Name field.
5. Click Import to complete the import procedure.
To Export an Entry or Phone Book:
1. Highlight the entries or open the Phone Book you want to export.
2. Select Export from the Phone Book menu.
3. Select All to export the entire Phone Book or Selected Items to export the highlighted entries.
4. Type a name for the file into the Export File Name field.
5. Click and identify the save location.


