


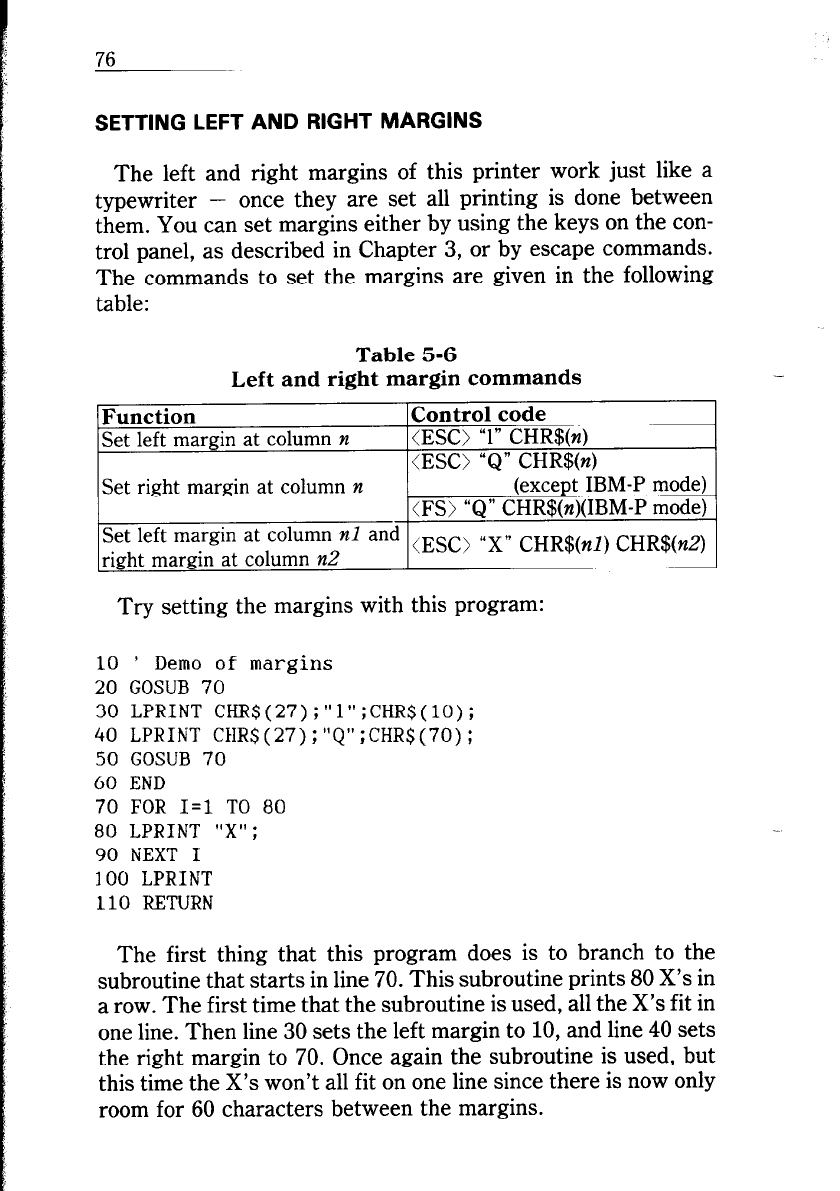
76
SETTING LEFT AND RIGHT MARGINS
The left and right margins of this printer work just like a
typewriter - once they are set all printing is done between
them. You can set margins either by using the keys on the con-
trol panel, as described in Chapter 3, or by escape commands.
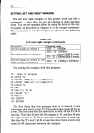
The commands to set the margins are given in the following
table:
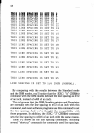
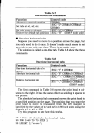
Table 5-6
Left and right margin commands
Function
Control code
Set left margin at column n
(ES0 “1” CHR$(n)
(ES0 “Q” CHR$(n)
-
Set right margin at column n
(except IBM-P mode)
(FS) “Q” CHR$(n)(IBM-P mode)
Set left margin at column nl and (ESCj ,,X,y CHR$(nl) CHR$(n2)
right margin at column n2
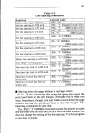
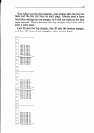
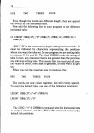
Try setting the margins with this program:
10 ’
Demo of margins
20 GOSUB 70
30 LPRINT CHR$(27);“l”;CHR$(lO);
40 LPRINT CHR$(27);‘1Q”;CHR$(70);
50 GOSUB 70
60 END
70 FOR I=1 TO 80
80 LPRINT “X”;
90 NEXT I
300 LPRINT
110 RETURN
The first thing that this program does is to branch to the
subroutine that starts in line 70. This subroutine prints 80 X’s in
a row. The first time that the subroutine is used, all the X’s fit in
one line. Then line 30 sets the left margin to 10, and line 40 sets
the right margin to 70. Once again the subroutine is used, but
this time the X’s won’t all fit on one line since there is now only
room for 60 characters between the margins.