SECTION 11 : Error Messages Explained
25
NOTE
Note 6
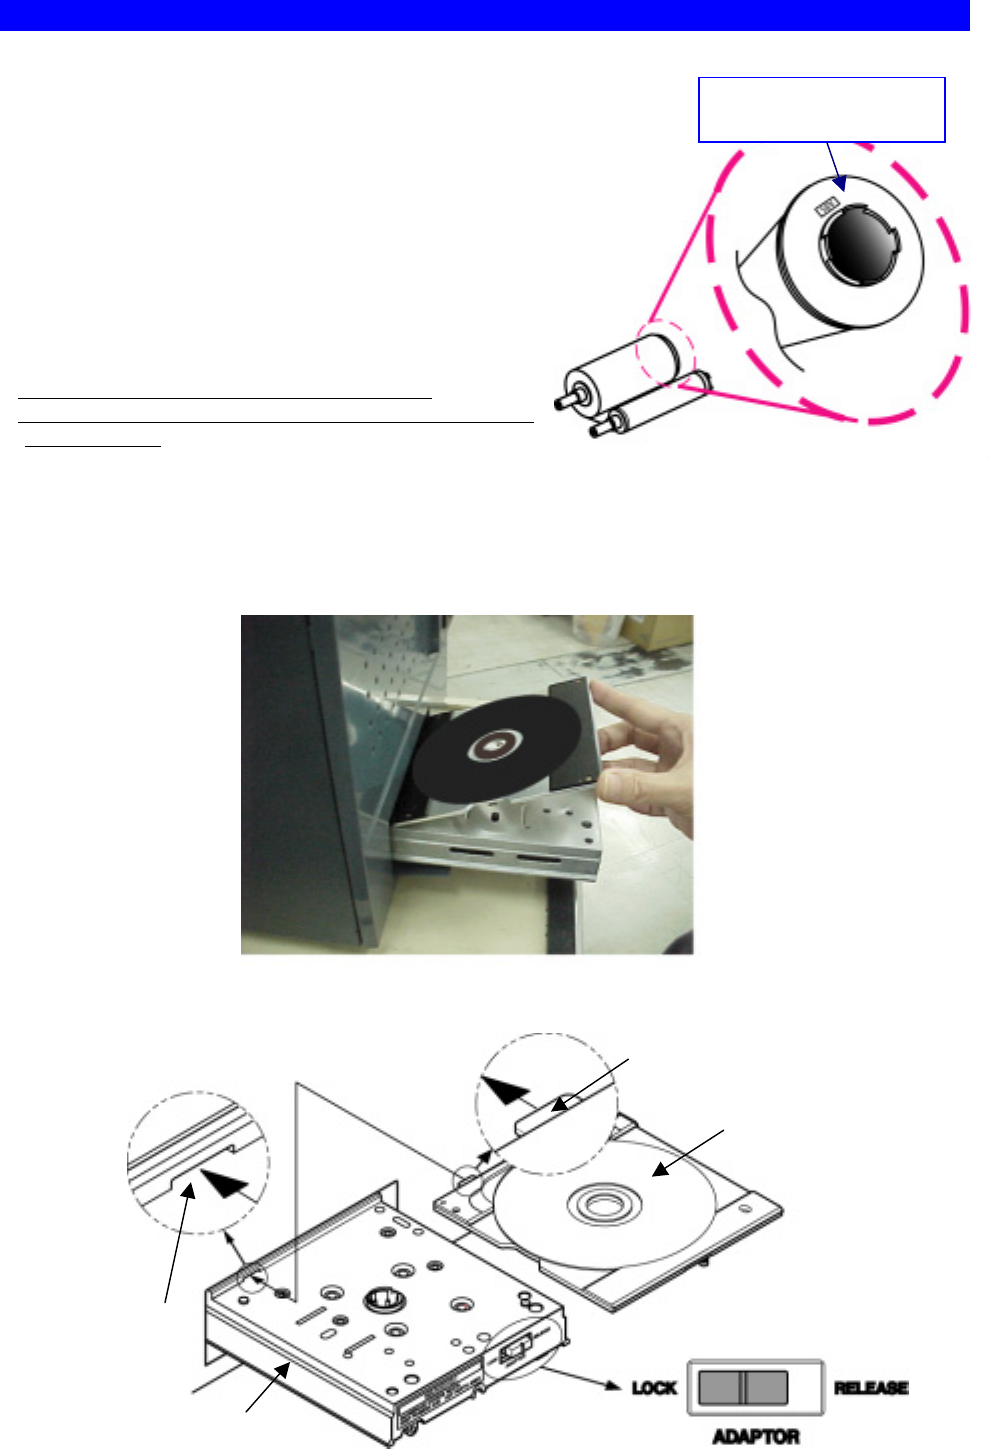
How to mount the disc adapter
1) Set the slide switch on the front of the tray drawer to the RELEASE position.
2) Snap the protrusion of the adapter into the cut-out in the tray, as shown below.
3) Make sure that the adapter firmly sits on the table and then lock the adapter in place by setting
the slide switch to the LOCK position.
Note 5
The COLOR and PHOTO ribbon shafts are of different
colors so that the printer can identify the two ink ribbons.
The PHOTO ink ribbon has a white shaft and the shaft
flange may get dirty depending on the environment. If the
PHOTO ribbon shaft has some dirt on the flange, the
printer may identify such a ribbon as COLOR ribbon by
mistaking the dirt for black from a COLOR ribbon shaft. If
the message “ERROR Wrong Ribbon Set” is displayed
when the correct set of PHOTO ink and transfer ribbons
are loaded, check the flange at the protrusion of the ribbon
shaft for dirt.
If you see any dirt on the protrusion, wipe it off.
*Do not use benzine, thinner, or any other equivalents as a
cleaning agent.
Check the shaft flange
for dirt.
Mounting Disc Adapter-1
Mounting Disc Adapter-2
Protrusion
Cut-out
Disc ada
p
te
r
Tra
y


