2.SETTING ITEMS (ADMIN)
Setting Network Functions 141
2 SETTING ITEMS (ADMIN)
4
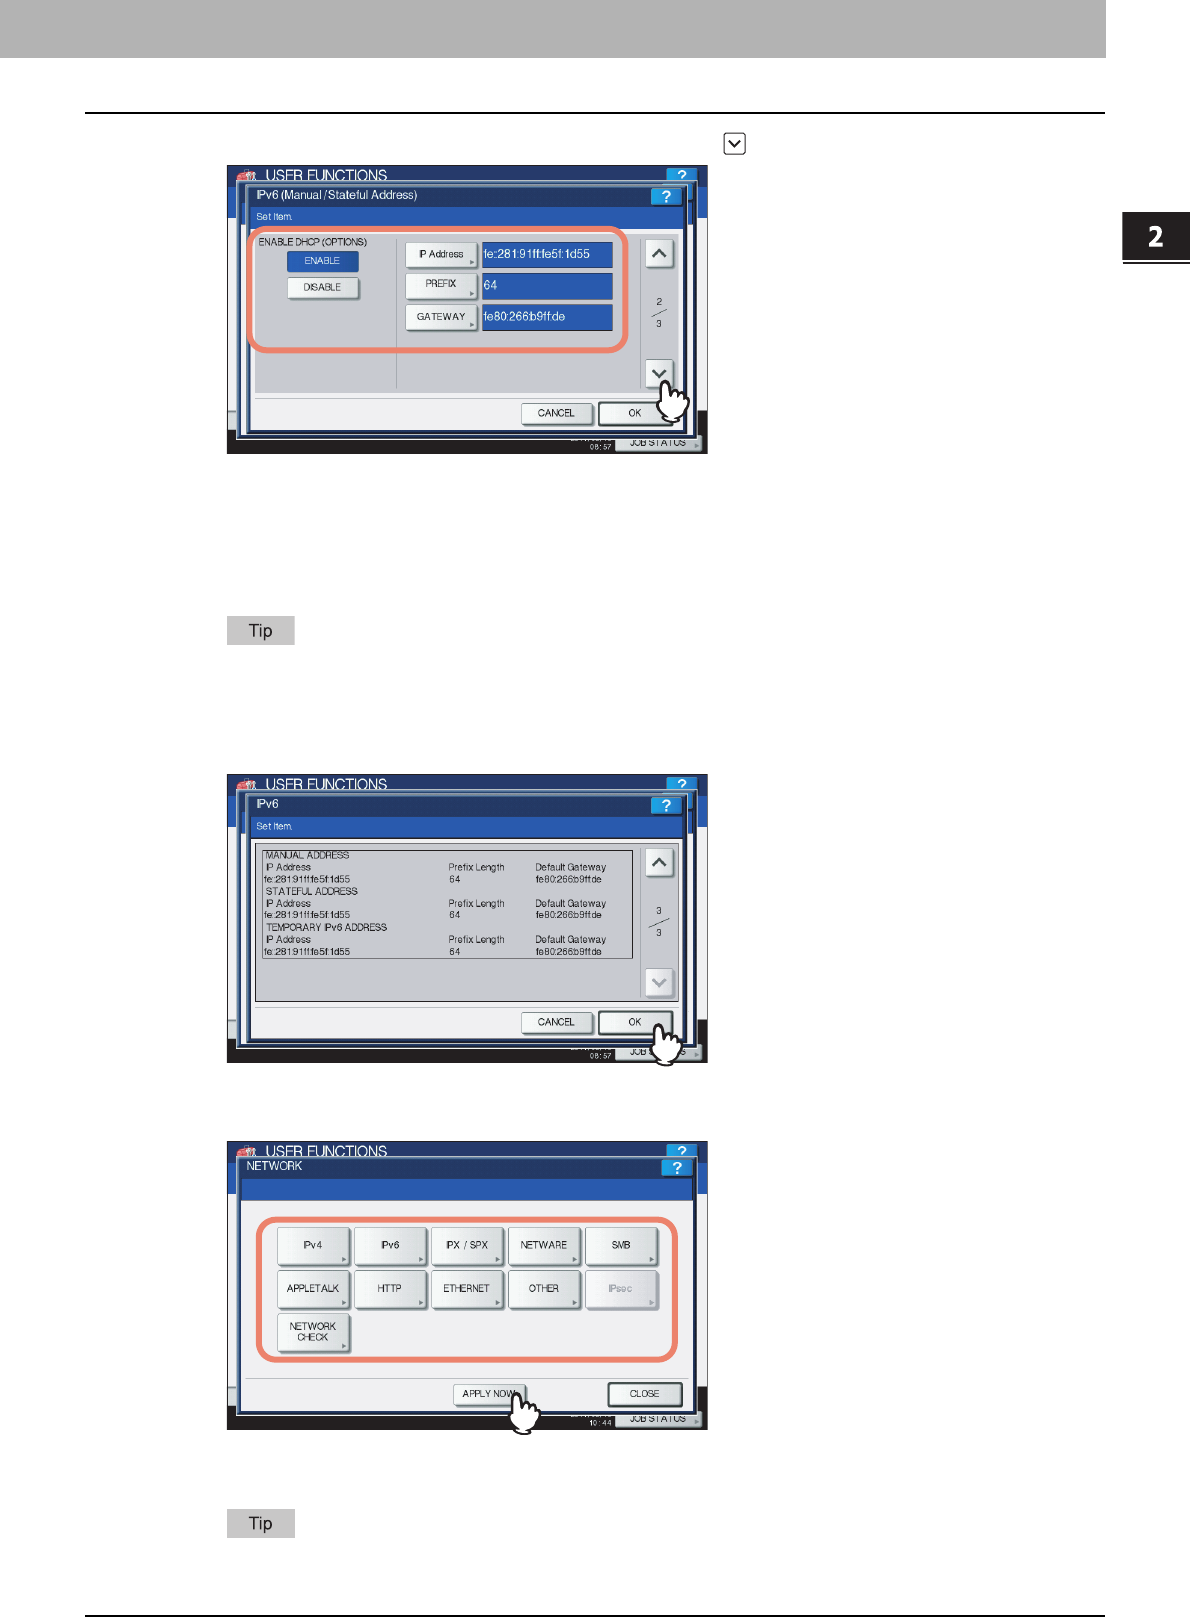
Specify the following items as required and press .
ENABLE DHCP (OPTIONS) — Select whether or not the optional information (IPv6 address for the DNS server,
etc.), except the IPv6 address for this equipment, which is issued from the DHCPv6 server, is used on this
equipment. Press [ENABLE] to use the information, or [DISABLE] not to use it.
[IP Address] — Press this button to assign the IPv6 address for this equipment.
[PREFIX] — Press this button to assign the prefix for the IPv6 address.
[GATEWAY] — Press this button to assign the default gateway.
When you press [IP Address], [PREFIX] or [GATEWAY], the on-screen keyboard is displayed. Enter the value
using the on-screen keyboard and press [OK] to set the entry. You can also use the digital keys on the control
panel to enter numerals.
5
Confirm the settings, and press [OK].
You will be returned to the NETWORK menu.
6
Continue to another network setting if required, then press [APPLY NOW].
“NETWORK INITIALIZING” is displayed at the lower left of the screen and this equipment starts initializing the
network interface card to apply the changes. This message disappears after it is finished.
If Duplicate Address Detection (DAD) detects duplicate addresses, the message “IPv6 ADDRESS CONFLICT”
is displayed on the touch panel.


