


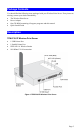


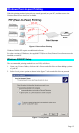
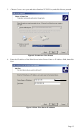

Figure 2: Wireless Print Server Screen
3. Click Next on the first screen of the Wizard, to view a list of Wireless Print Servers on
your LAN.
4. Select your new Wireless Print Server, then click Next to continue.
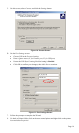
5. Enter the required data on the following screen.
• Name of the Print Server can be changed if you wish.
• Comment is optional.
• Select or enter the Workgroup name for this Wireless Print Server.
6. Click Next to configure the TCP/IP Screen:
• Select Obtain IP Address automatically if your LAN has a DHCP Server, otherwise
select Fixed IP Address.
• For Fixed IP Address, enter an unused address from the range used on your LAN, or
click the Suggest New Values Button.
Use the same Network Mask and Gateway as PCs on your LAN.
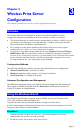
7. On the Wireless Screens, the settings should be set to match your other Wireless Stations.
For details about each setting, refer to the following section Wireless Configuration.
8. Click Finish to save the data to the Wireless Print Server.
Note: To install the Wizard on your PC, use the "Installation" option.
If the desired Wireless Print Server is not listed:
• Check all cables to the Wireless Print Server.
• Check the Wireless Print Server's LEDs:
• The Red LED should be OFF and the Green LED should be ON or flashing.
• Check the LAN and WLAN LEDs. Both should be On (if a LAN cable is connected).
• Check that your PC and the Wireless Print Server are on the same LAN segment. (If
you don't have a Router or Gateway on your LAN, you only have 1 segment.)
• If using the Wireless connection, ensure that your PC's Wireless settings match the
Print Server.
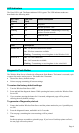
• Check that your PC has either the TCP/IP or NetBEUI network protocols installed. See
Checking your Network Protocols on page 10 for details.
Page 7