Netware Systems
Overview
• The Print Server must be configured as a valid device on your TCP/IP network.
• To use NDPS (Novell Distributed Printing Services), the Novell server must be running
Novell NetWare 5, and the PCs (clients) must be running IntranetWare Client V2.2. or
later.
The following procedure is designed to enable Public Access Printing under NDPS. Public
Access Printing allows anybody on the network to access the printer.
Creating an NDPS Manager Object
If an NDPS Manager Object already exists, skip this procedure and proceed to Creating an
NDPS Printer Agent.
1. Login to NetWare 5.0 Server as Admin and start the NetWare Administrator program
Nwadmn32.exe.
2. Select the container on NetWare Administrator where you want the NDPS Manager object
to reside. (e.g. TeSupp)
3. Select Create - Object from the menu bar to view the New Object dialog.
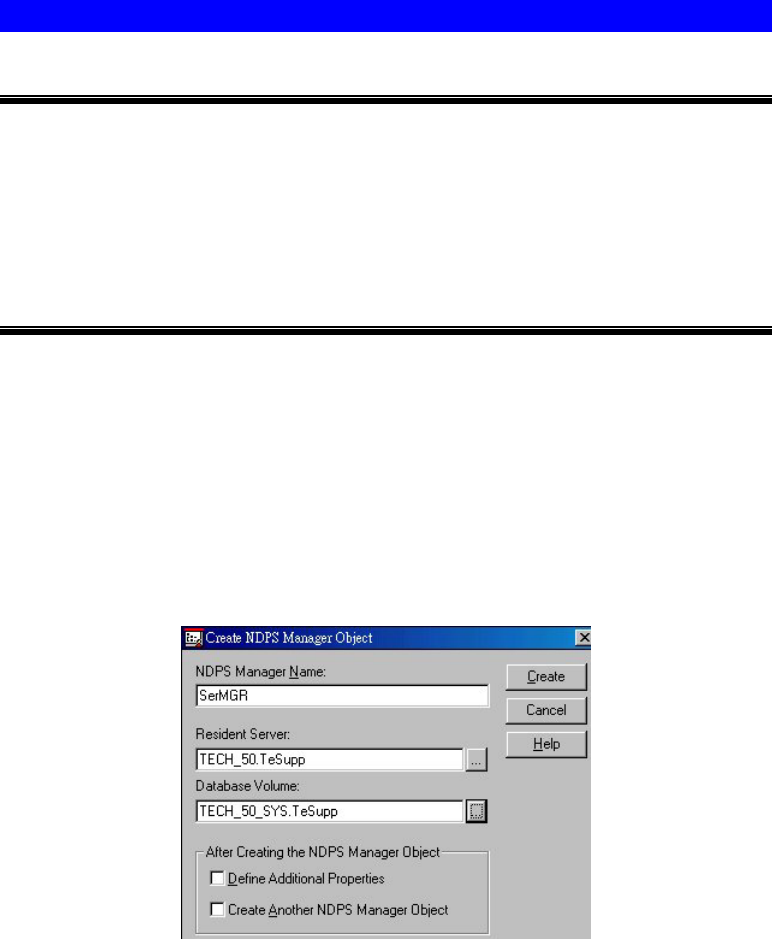
4. Select NDPS Manager as the object to create. The Create NDPS Manager Object window
shown below will appear.
Figure 46: Create NDPS Manager Object
5. Type a name in the NDPS Manager Name.(e.g. SerMGR in Figure 1 above)
6. Browse the Resident Server and select where you want the NDPS Manager object to be
assigned. (e.g. TECH_50.TeSupp in figure 1 above)
7. Browse the Database Volume and select where you want the NDPS Manager database to
be assigned. (e.g. TECH_50_SYS.TeSupp in figure 1 above)
8. Click Create. The new NDPS Manager will appear in the main browser window.
To start the NDPS Manager in future, enter the following command at the console:
LOAD NDPSM
then select the NDPS Manager object.
To start the NDPS Manager whenever you bring up the server, add a command like
the following to your server's AUTOEXEC.NCF file:
LOAD NDPSM SerMGR.TeSupp
The last item is the name of the NDPS Manager object you wish to load.
Page 74


