Windows SMB Printing
This method requires no additional software to be installed, but the NetBEUI or TCP/IP
protocol must be installed on your PC. Use the following procedure to install the Wireless Print
Server's printer as a Windows SMB network printer:
1. Double-click the Network Neighborhood icon on the desktop.
2. On the View menu, select Details.
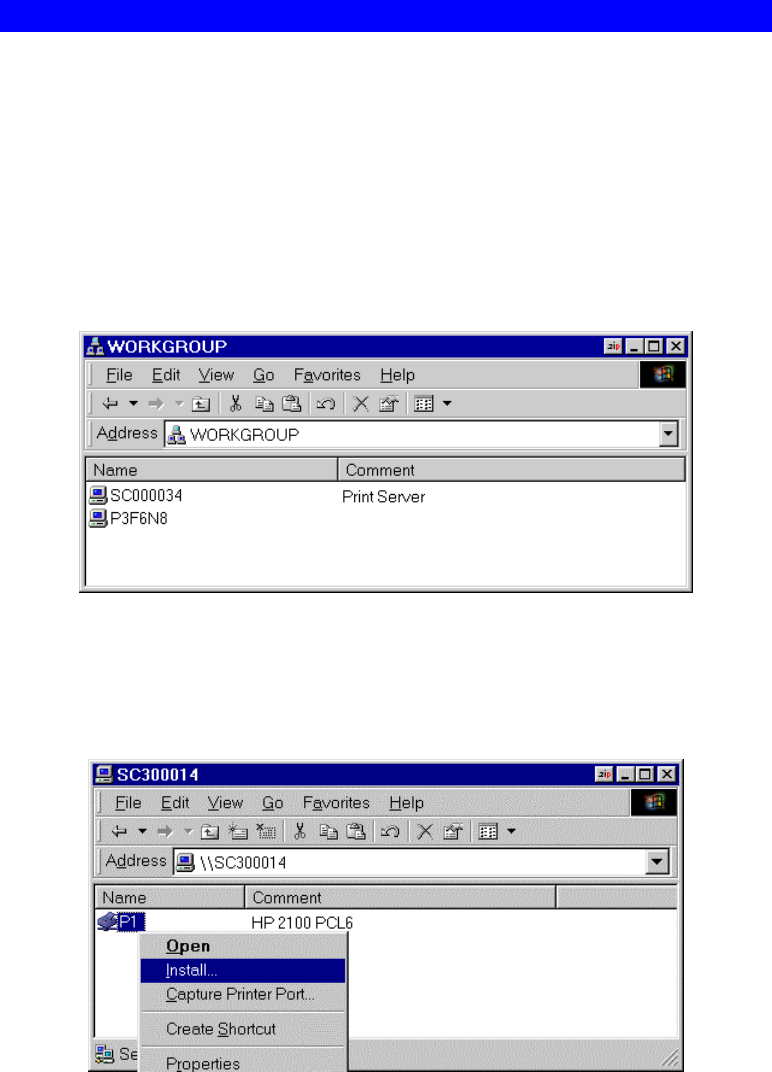
3. Locate the desired Wireless Print Server, as shown below:
• If it is the same Workgroup as your PC, it will be listed on screen.
• If it is in a different workgroup, double-click Entire Network, then double-click the
appropriate Workgroup to open it.
Figure 17: Network Neighborhood
4. Double-click the Wireless Print Server icon to view a Printer icon for each printer port.
The "Comment" field may indicate what type of printer is connected to the port.
5. To install a printer, right-click the desired printer icon, and choose "Install", as shown
below. This will start the Add Printer wizard.
Figure 18: Install SMB Printer
6. Follow the prompts to complete the installation.
• For information about the question "Do you print from MS-DOS programs?", see
Printing from MS-DOS Programs below.
• Select the Printer Manufacturer and Model to match the printer connected to this port
on the Wireless Print Server, and complete the Wizard.
7. This printer will now appear in your Printers folder (Start - Settings - Printers) and can be
used like any other printer. However, SMB printing is not suitable for large complex print
jobs - you should use the Peer-to-peer Printing instead.
Page 20


